Usually Tone Mapping is used with HDR (32-bit) images. We often find the Photomatix Details Enhancer also useful with 16-bit TIFF files. We like the unique look it can create.
We start with a very soft image out of Lightroom 1.4:
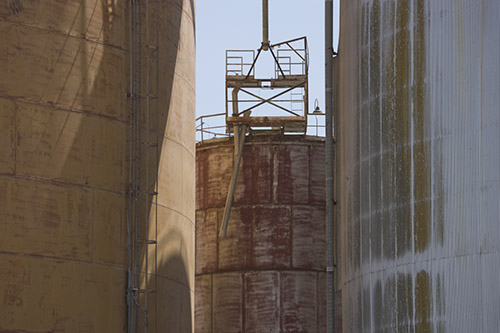
We keep it intentionally very soft so that no highlight or shadow details are clipped. As you can see a HDR image would not contain more data because neither shadows nor highlights are clipped.
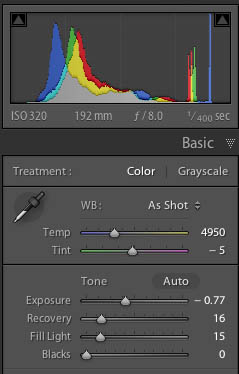
We create a new layer and use the Photomatix Details Enhancer. We can use the Photomatix Photoshop plugin or Photomatix 3.0 (using the DOP Layer Helper).
Tone Mapping in Photomatix 3.x
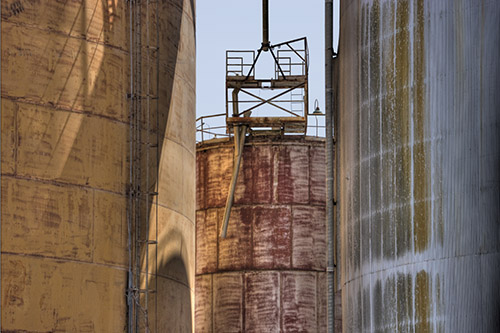
The tone mapped version looks like this:
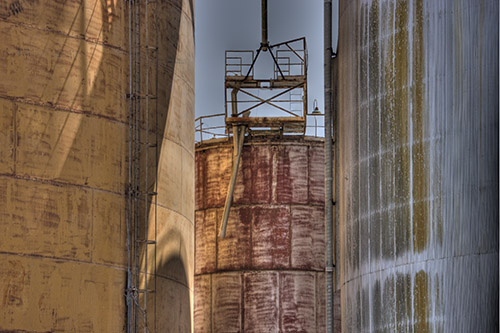
After Tone Mapping
We don't like the sky and create a Layer Mask (with the CS3 Color Range tool) to use the sky from the original image:
Mask
Sky after masking
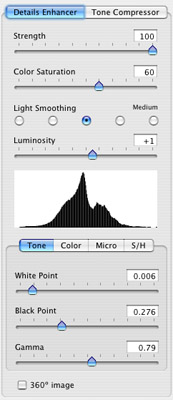
In the next step we improve the texture with the DOP Detail Extractor. We go slightly over the top to bring out the rusty rotten structures.
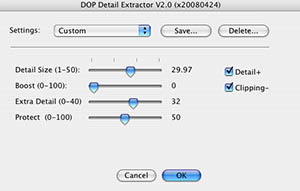
Detail Extractor settings

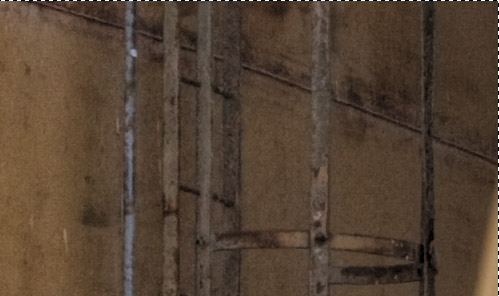
100% pixels before Detail Extraction

100% pixels after Detail Extraction
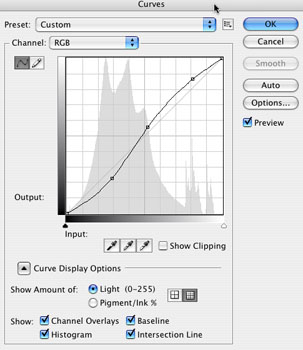
In a final step we use some curves to get the tonality up to our taste. We like it a bit moody dark here:

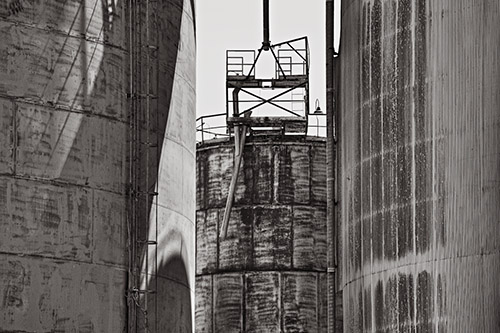
Final result
BW variation (converted and toned in Lightroom 1.4)
Conclusion
We find the Photomatix Details Enhancer Tone Mapping very helpful to create images with dark yet glowing shadows. This is the result of local contrast enhancements:
- On a larger granularity with Details Enhancer
- On a smaller granularity with DOP Details Extractor
|