Photomatix added with the new 3.1 beta versions support for Lightroom and the opening of tonemapped images into other editors (most importantly Photoshop). We show a typical workflow.
Note: Best use at least beta 9 on Mac and beta 10 on Windows.
Installing the Photomatix Lightroom Plug-in
- Download the plug-in beta from here
- Unzip the downloaded file
- Copy the Photomatix Lightroom plug-in into a folder where you want to store all your extra Lightroom plug-ins
- Open the Lightroom Plug-in manager
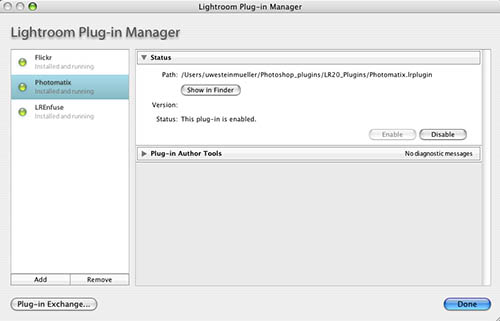
- Add the Photomatix plug-in in the Plug-in Manager. This is an easy and fast operation.
Using the Photomatix export plug-in
Have your source images selected
and use the normal Lightroom Export Dialog (select Photomatix as export method)
We use an even faster method and activate the export via a right click (see below):
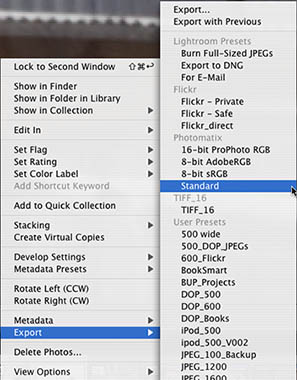
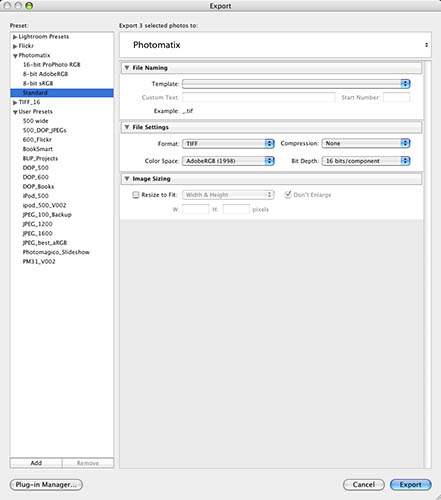
Because we use the Adobe RGB color space in Photoshop we select the export preset "Standard" (this preset uses Adobe RGB at 16 bits).
Normally the Plug-in finds the right Photomatix version but in some case it may show this dialog:
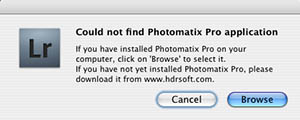
Do as instructed and select the most recent Photomatix binary. Next time the plug-in will use this setting again.
Once Lightroom has finished exporting the TIFF files Photomatix takes over control
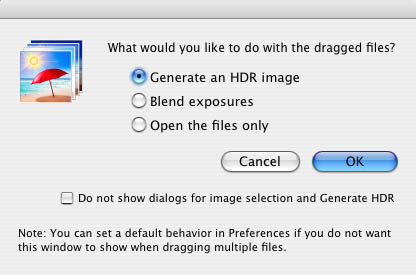
and you can select the normal Photomatix options (HDR or blend exposures).
There is a check box to avoid this dialog if you want to use a standard behavior.
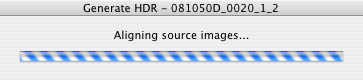
Then Photomatix takes its time and generates the HDR file while showing a busy indicator (shows also the current processing step)
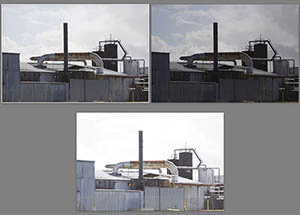
Tonemapping
Normally you then tonemap your HDR image:
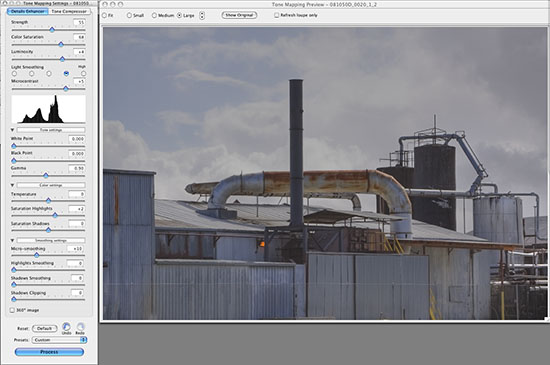
Once the parameters are to your liking the HDR image gets tonemapped.
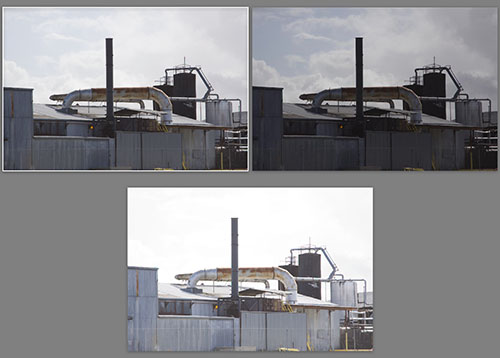
If you save the processed tonemapped photo Photomatix 3.1 offers a new option "Open saved image with"
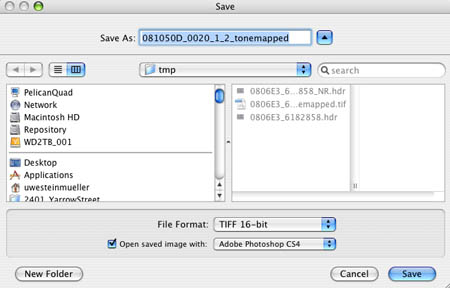
We always open the image in Photoshop for final processing. You also can re-import into Lightroom here instead.
Yes, we already work with Photoshop CS4. After some more editing in CS3/4 we get the following result:
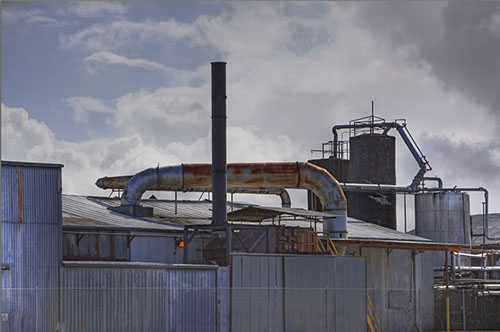
Note: As you can see we cloned out some disturbing elements at the bottom of the image.
Some advanced Tips using Lightroom with Photomatix
CA removal
Photomatix 3.1 helps to reduce CA (Chromatic Aberrations) quite a bit. In this case the CA was too strong to be corrected even in Photomatix 3.1.
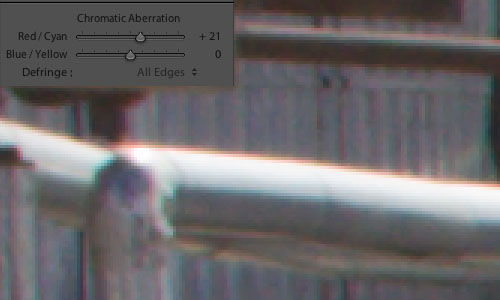
CA at harsh contrast edges
Using the Lightroom CA tool got rid of it:
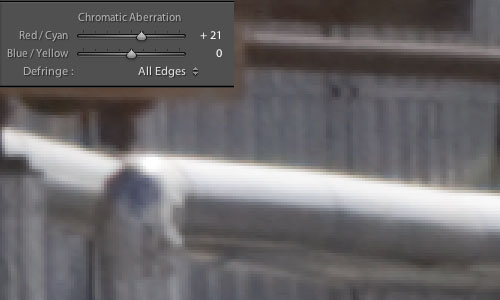
CA in check (see the settings)
It is important to apply the same CA settings to all your source images (best use the Lightroom Synchronize function).
Advanced use of Lightroom Highlight Recovery
We had taken 3 shots. It is always good to check the histograms of the most underexposed and overexposed photos.
- If the most underexposed photo shows still clipping in the highlights also the final tonemapped image will have the same clipped highlights because there are no real data available in the the exported TIFF files.
- If the most overexposed image shows still clipped shadows you will likely get more noise then you may like in the final tonemapped image.
Here is our underexposed photo histogram:
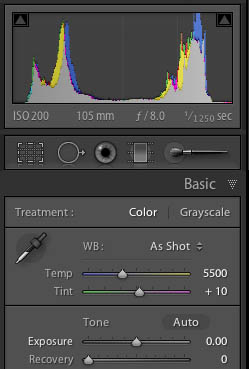
The highlight clipping does not show much but still will be visible in some areas in the final result.
That is why we use a trick and recover some highlights in Lightroom. Here are the improved settings:
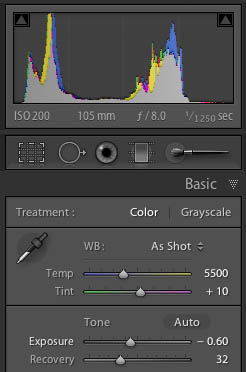
Corrected Exposure and Recovery settings
Again apply the same settings to all source images.
Conclusion
The new Photomatix Lightroom plugin and the possibility to open tonemapped images directly into Photoshop improves the HDR workflow a lot.
|