We reviewed Unified Color's HDR Photo Studio in February 2010. The new version is now called HDR Expose. The core concept is the same but the the software got some very useful new UI and major functionality upgrades.
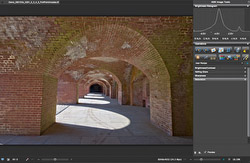
Here is the new UI when opening a HDR photo:
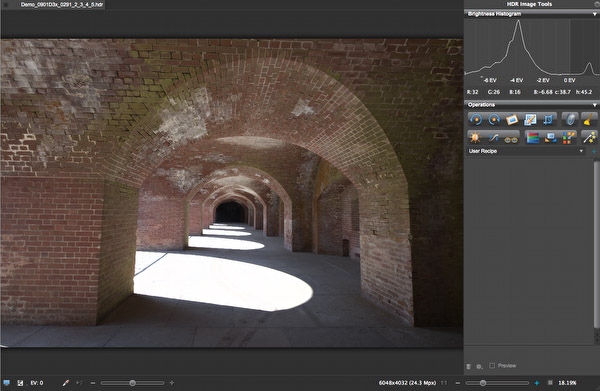
The operations are now on the right side (as we will explain this is not just a new layout) and we now have a histogram for the image.
Histogram
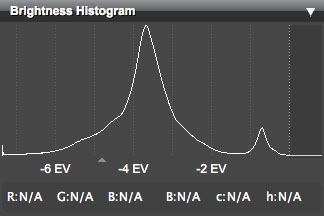
This was a major miss in HDR Photo Studio. Here is the new histogram:
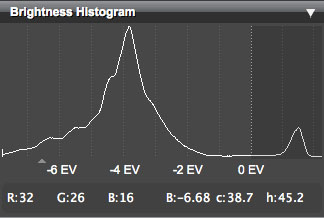
This is not just a simple RGB histogram that shows how the brightness values will show in a potential final TIFF or JPEG file. The area left from the 0EV mark would show in a saved TIFF/JPEG image. But everything on the right of 0EV would be clipped and lost. This clearly tells us that we need to apply a Brightness/Contrast operation to map these values below 0EV and it also tells that we need to shift it at least -1.5EV.
In consequence we add a Brightness/Contrast operation and find appropriate values:
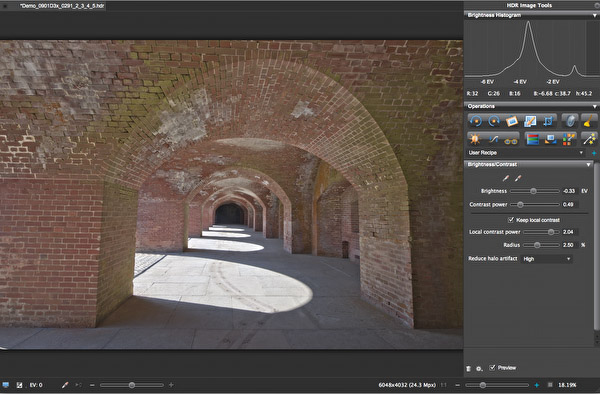
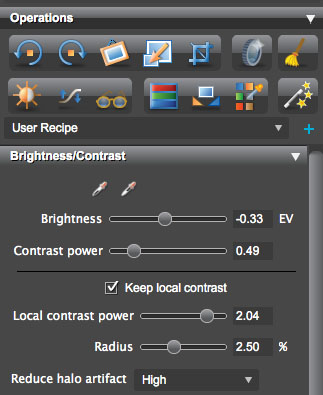
As you can see we control the Brightness/Contrast by a combination of:
- Brightness
- Contrast Power (global contrast, below 1 mean lower contrast)
- Local Contrast Power: to compensate the flatness introduced by lower global contrast)
- Reduce halo artifact: to fight halos that result from the Local Contrast boost
Operations Stack
HDR Expose shows now an operations stack and we can go even back to previous operations and change them.
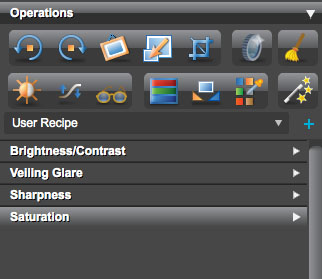
Operations Stack
Note: If you go back to previous operations this will take its time because all is recalculated. We think the added flexibility is worth this wait.

Final Result
In this case we used the following operations (we described them in our article about HDR Photo Studio):
- Brightness/Contrast
- Veiling Glare
- Sharpness
- Saturation
Here is the final histogram:
Lightroom and Aperture Integration
HDR Expose also improved the Lightroom and Aperture integration:
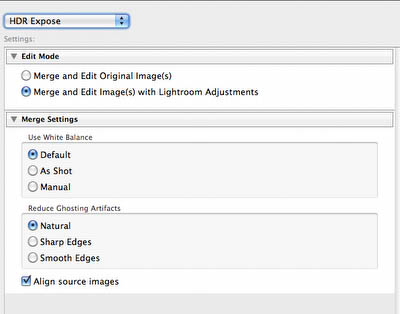
Lightroom export options
We always use the "Edit Image(s) with Lightroom Adjustments" because we want to utilize the lens corrections in Lightroom 3. The resulting TIFF/JPEG images are re-imported into Lightroom. We most of the time work directly with the Lightroom plugin.
Our Wish list
- Option in the LR plugin to open the resulting image into Photoshop instead of re-importing into Lightroom.
- Color Channel Histograms
- More precise histogram at 0EV to check even minor clipping
- Speeding up the processing (maybe a non issue on new machines with current GPUs, we use a 3 year old Mac Pro with 4 CPUs).
- If you save the TIFF file from the Lightroom plugin HDR Expose should suggest a more meaningful name than just "Undefined".
Upgrade for users of HDR Photo Studio
If you own HDR Photo Studio your upgrade is free. You need to enter your serial number again during the new installation.
Conclusion
Very useful improvements for an interesting HDR application. If you are interested into HDR we think you need to checkout HDR Expose. For our work HDR Expose is clearly one of our core HDR tools.
Unified Color Web Page |