George Barr wrote his article "Get those highlights right, and shadows too" a while ago. We find this technique very useful and use it always in our workflow. Today we publish a free script that implements the needed helper layers.
Note: This script creates layers that are only needed to analyze your image. Once you are done you can discard the layers. It is quite common that we create and delete these layers more than once during our work on one image. This is no problem because these are fast lightweight operations.
You can download the DOP ThresholdCheck script here. Unzip the file, copy the script to the CS3/CS4 Presets/Scripts folder and restart Photoshop.
Note: We recommend to call the script via a keyboard shortcut. This article explains in easy steps how you can archive this.
If you run the script from File->Scripts you should have selected the top layer and if the top layer is a Layer Group it should be collapsed. After you run the script you see this layer group:
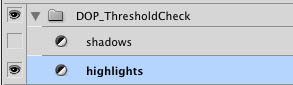
Both layers (shadows and highlights) are Threshold Adjustment layers.
- Highlights shows Threshold 250
- Shadows shows Threshold 10
By default only the highlights layer is enabled. We show in a few sample screen shots how you evaluate your image.
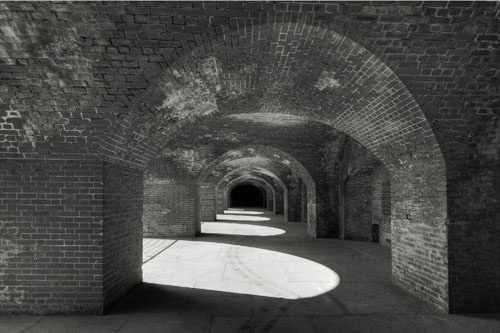
Image to be analyzed
Note: This image from Fort Point is a 5 shot HDR image that we tonemapped with our new technique and converted to B&W using our DOP_BW_Resolver.
Highlights
Good detailed highlights are crucial. They should be detailed, not blown out and yet bright. We use this technique for color and B&W images.
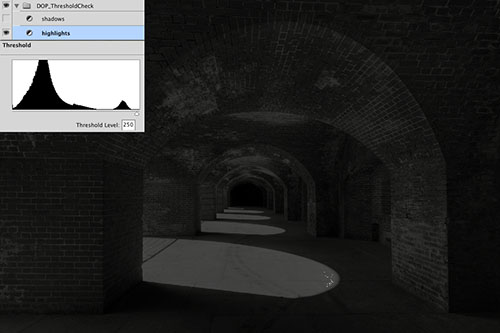
Highlight view: ok
You can see a darker version of the original image. Where you can see white the original image data are at 250 or brighter. In this case there are only a few small sprinkles of white and this should be just fine. It is also useful to watch the histogram in the Threshold tool
Highlight view: critical
If you see the above picture you likely have lost larger areas in the highlights. All these white areas will print very bright or even just show pure paper white.
Note: Watch you workflow from your first steps (e.g. RAW conversion or HDR tonemapping) that you never encounter critical blown highlights. If you could not prevent this to happen cloning these bright areas can also be a valid last resort.
If the highlights view does not show any white areas you may check whether you can push the highlights some more without getting bad clipping.
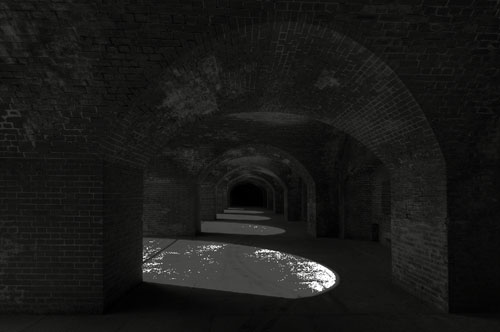
Shadows
We then disable the highlights layer and enable the shadows layer:
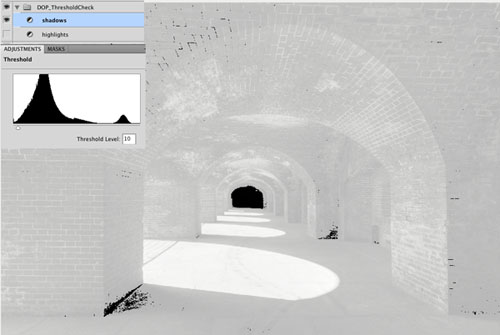
You see now a brighter original image. All areas that show black have a value of 10 or lower. This means that in most prints these areas print near maximum black. In our case we find it to be not a problem. Solid black areas in prints can be very much ok while areas of bright white pure paper hardly ever are.
If the shadows view does not show any black areas you may check whether you can push the shadows some more to get a better black definition.
When you are done just discard the DOP_ThesholdCheck Layer Group.
As mentioned we use this technique all the time for our new HDR Tonemapping method , B&W conversion and enhancing the Midtone Contrast. |


