DOP Luminosity Color Tuning
DOP Luminosity Color Tuning is a Photoshop CS3/4 script that helps to tune the color, darkening and lightening effect of Photoshop layers.
Motivation
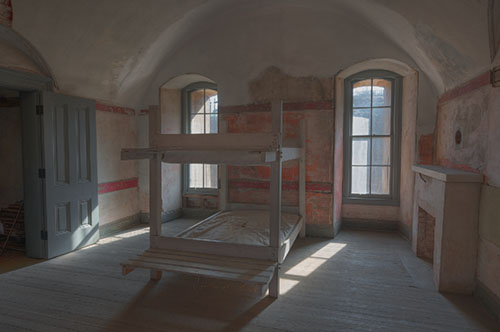
This tool really needs some more motivation. Lets assume we have a workflow where we put a layer created by Photomatix Details Enhancer (the popular tonemapper in Photomatix or the plugin) und top of an initial base image layer. Here is an example of this:
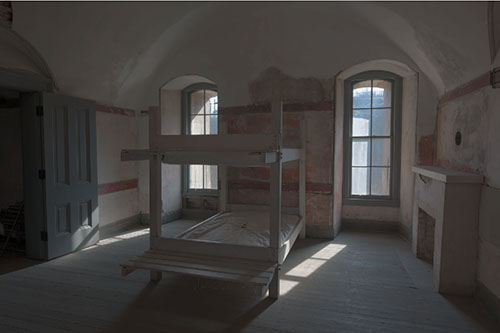
Before image
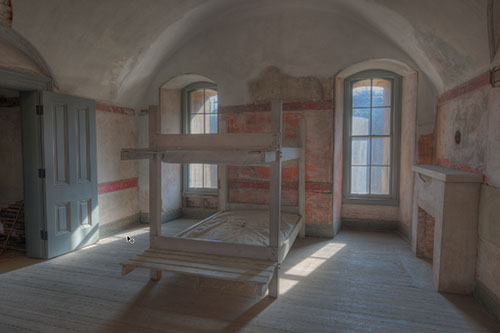
After processing with Photomatix Details Enhancer
Note: We cover the full workflow later in this article.
Important for now is that Photomatix did change the following:
- Tonality (Luminosity)
- Colors
Often we may like the tonality and would like to tune down some of the color changes. To split this layer into a layers one just dealing with the Luminosity and the other one dealing with the Color is quite trivial. Just duplicate the layer and have one layer in Luminosity blending mode and the other one in Color blending mode.
We found this too limiting. We wanted to change independently the following factors:
- Color (like described above)
- The darken of the layer effect
- The lighten of the layer effect
Often you may like some of the the darkening that happens and maybe not as much the lighten effect. The new DOP Luminosity Color Tuning (LC = Luminosity/Color) script does exactly this. Any layer that changes areas of the image by color, darken and lighten can be split into three new layers that let you control any of these effects independently. We added a fourth Levels layer to facilitate some further tonality tuning. It is all about improved visual tuning here.
To better understand this process please read the full tutorial at the end. This tutorial is likely even interesting for you if you are only interested into its alternative HDR tonemapping.
Installation
The DOP Luminosity Color Tuning V1.0 comes as a Javascript file for Photoshop CS3/CS4 (we only support CS3/CS4).
- Full version is named: DOP_LC_Tuning_V1.jsx
- Helper script: DOP_MergedLayers.jsx (see below)
Installing the script
The script needs to be copied to the Photoshop CS3/CS4 folder and here to Presets/Scripts (or to the equivalent locations for other languages). After restarting CS3/CS4 you should find the script under File->Scripts. If you do not find it there you did not put the script into the proper location.
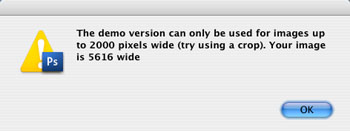
Note: The free demo version can only handle images up to 2000 pixels wide. The commercial version does not have this restriction. You will get this warning message if you use larger images with the demo version:
Using the DOP Luminosity Color Tuning
Using the script
Using the script is simple. Best you have the top layer selected while working with the Luminosity Color Tuning tool. Best to give the top layer a short yet meaningful name.
Note: Watch that you are not still in the name editing mode of the top layer. Otherwise the names could be surprising.
Run the script from File->Scripts
- DOP_LC_Tuning_V1 (or the Demo version)
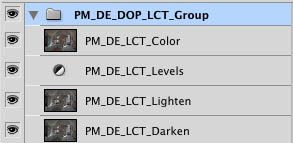
The DOP Luminosity Color Tuning does not have a user interface in the script. All control is performed in CS3/CS4 using the created layers:
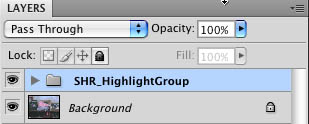
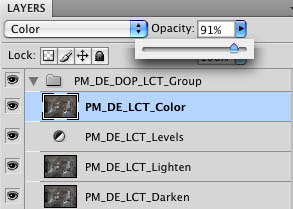
The script splits the top layer into a Photoshop Layer Group “<you layer name>_LCT_Group” with two layers:
- <you layer name>_LCT_Color (Blending mode set to Color: don’t change this blending mode)
- <you layer name>_LCT_Levels is set by default to no changes at all and is only provided as a convenience
- <you layer name>_LCT_Lighten (Blending mode set to Lighten: don’t change this blending mode)
- <you layer name>_LCT_Darken (Blending mode set to Darken: don’t change this blending mode)
You can then change the opacity of the Color, Darken and Lighten layers to optimize the image result. In some cases you may even disable one of these layers entirely. For further tuning you may also change settings in the Levels Adjustment layer.
We hope you discover that splitting layers into Color, Darken and Lighten components is a very logical and efficient way to improve your photos.
Just for the fun try to split a simple S-Curve layer into the three components. This means that the application of the DOP Luminosity Color Tuning script is by no means limited to HDR tonemapping.
Helper script: DOP_MergedLayers.jsx
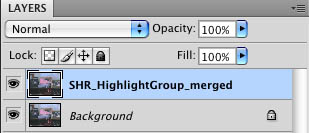
If you have found your preferred settings you may want to merge the Layer Group to save disk space. Because using “Merge Group” in CS3/CS4 can show a different result than what you are seeing using the Layer Group we provide a helper script that creates a new layer with the merged result.
- Make sure the Layer Group is the top layer
- Run the DOP_MergedLayers script and it creates a new merged layer with the same effect as the original Layer Group.
You still can lower the effect by tuning down the opacity of this layer.
Advanced HDR Tonemapping using DOP Luminance Color Tuning
For our "Light in the Dark" work (Alcatraz and Fort Point) we have to deal with strong light from the windows. Even at five exposures at 1EV steps the highlights are easily blown. The workflow we show here seems to work very well with these kind of HDR images. Actually it also works well with many other HDR samples.
As always Photomatix Details Enhancer is the core step in the process. But as you will see we use it on a 16 bit image and not the HDR image itself.
We start with a HDR file (created in Photomatix):
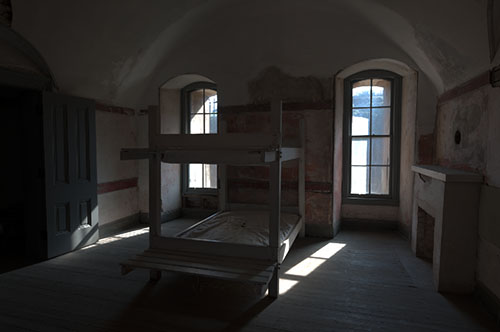
HDR with strong light in the windows
Our first step is to convert this HDR file to 16 bit using the Photoshop Exposure/Gamma method:
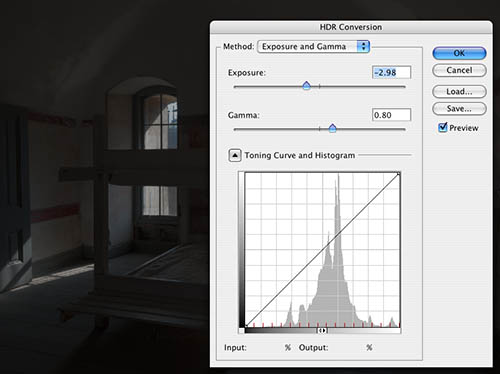
Exposure and Gamma 32 to 16 bit conversion
This is for us actually only some sort of base conversion. The main goal is to prevent any clipping in the highlights. The settings don't need to be precise as long as no highlights are clipped. If they show up clipped in the next step you should use a lower exposure value. Unfortunately Photoshop does not show any histogram for the resulting 16 bit image before the conversion is performed.
The nest step uses a simple Levels Adjustment layer to set a usable black, white and gamma point:
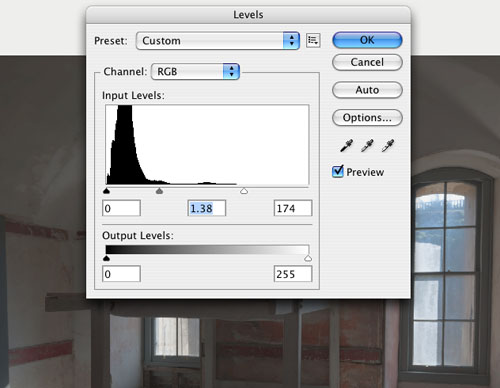
White Point and Gamma changes
Be careful that the White Point leaves some headroom. We also use the Gamma setting to make the image brighter.
Now it is time to use the Photomatix Details Enhancer tonemapping (either the Photoshop plug-in or use the the Photomatix application to tonemap the image):
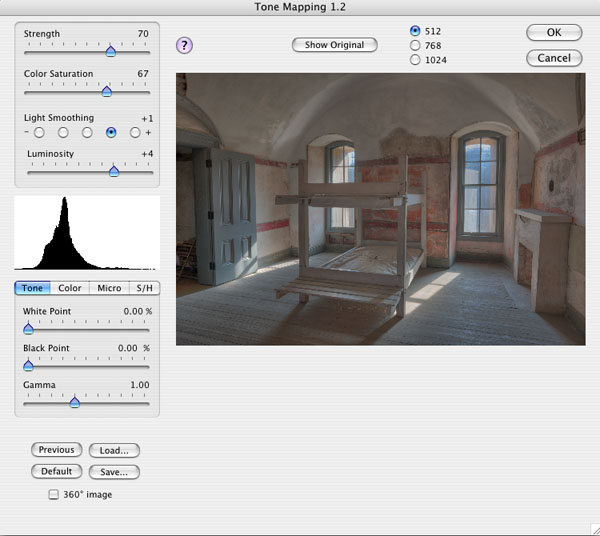
Photomatix Details Enhancer Tonemapping
Here something interesting happens. We nearly always use the same settings (makes the process more consistent). Only the white Point, Black Point and Gamma may get slightly adjusted. Again we avoid highlight clipping at all cost. It is no problem if the saturation settings are a bit to strong. We can fix this later.
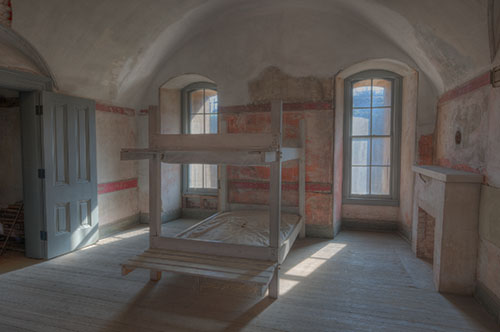
After using Photomatix
Now we use the DOP Luminance Color Tuning script to split the Photomatix layer into the Color, Darken and Lighten components:
Layer Group after running the script
First we now check the Color layer and adjust the opacity if needed.
Tuning the color saturation
Then we tune both the Lighten and Darken layers:

Lighten layer tuning (same with Darken layer)
Finally we use some detail enhancement (either Detail Extractor or EasyD Plus) and tone down the blue shadow cast using a Hue/Sat layer.

Crop before detail treatment

Crop after detail treatment
Here is our final result:
We are very pleased using this method to produce photos from HDR that master the challenges of clipped highlights and show the right mood that we are after.
Here is an article that shows how to use DOP Luminosity Color Tuning for improving the Midtone Contrast.
Get a demo or order DOP Luminance Color Tuning
|