Pleasing Results
I’ve recently returned
from my first photo trip with my new system—a PhaseOne
P45 (39 megapixel) back on a Mamiya 645AFDII . After using a
4x5 for
the last 30 years, it was quite a change!
Just lifting the camera backpack brought a smile to my face (it’s
about 10 lbs. lighter). I greatly enjoyed the agility and mobility
of a medium-format camera, especially with the zoom lenses. I
was also able to do close-ups fairly painlessly, quite a change
from
4x5. I didn’t need to worry about running out of film—my
tiny card case had four 4 GB cards, allowing for about 350 exposures!
And, unlike 4x5 film, where each click of the shutter adds up
to around $4.50—these were…free! (Free, after you
pay the rather steep price of admission for the P45 back). This
is
actually quite liberating, as there is no reason now not to try
more adventuresome compositions and/or lighting situations. (Situations
that I previously would have talked myself out of, due to film
costs, and low probability of success. But…taking chances
is important.)
The only downside to my new system is working with
depth of field. On my 4x5 Linhof, I have a focusing gauge that
allows me to quickly
determine the optimum f stop for each situation. With the Mamiya
and the zoom lenses, this is much harder to determine. On the
plus side, a composition that required a 200mm on the 4x5 needs
only
an 80mm for the P45 sensor. And with that smaller focal length
is around a 2.5 times increase in available depth of field.
I
really enjoyed working with this new system. So much so that
I started to think that this small camera and sensor couldn’t
really deliver top-notch results, could it? Where was the suffering
for my art? (Actually, after making dye transfer prints for 15
years, I think I’ve suffered enough.) I was in for a surprise.
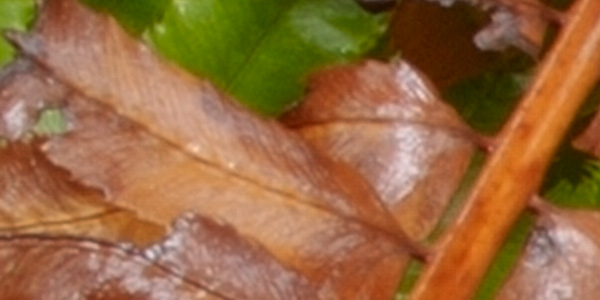
With even the most demanding subject, I was able to make 24x30
prints that were tack-sharp. Here’s a closeup of some sword
ferns.
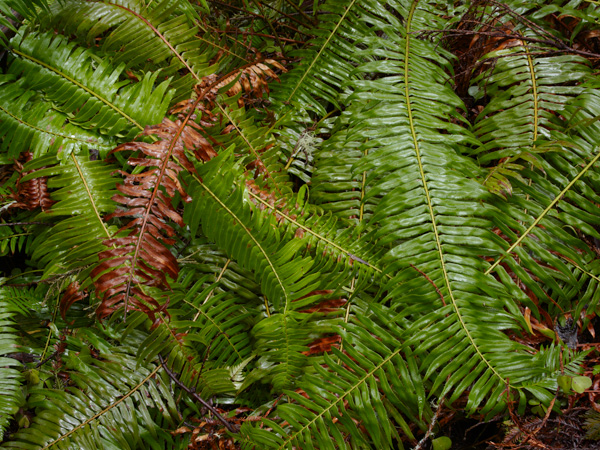
The tiny little ribs on each fern are reproduced
in amazing detail. (These ribs are not even visible in the jpeg).
I decided to see if this image would take further enlargement to
30x40 size. At that size, with Capture One software, it did start
to fall apart a little. Viewing it on the monitor at 100%, smooth
areas started looking “funky”—but those sharp
little ribs were still sharp. Viewing the image at closer to 50%
on the monitor gives a better idea of how the resulting print will
look. And this made an acceptable 30x40 print. Calypso Imaging
(www.calypsoinc.com) wanted a new 40x60 inch print from me for
their lobby, and I thought this image might work. But I had my
doubts about how it would enlarge—I’d have to do some
careful testing first.
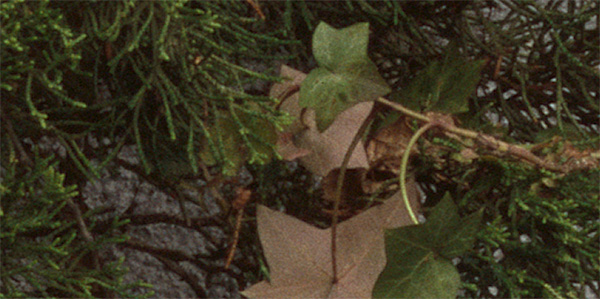
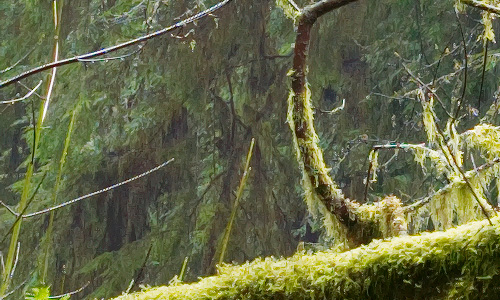
Another favorite from this trip to the North
Coast Redwoods is below:
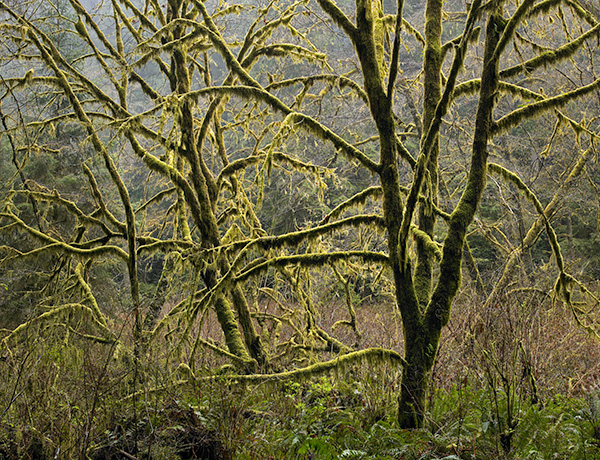
This scene was truly beautiful. Softly backlit trees, with moss
hanging on almost every branch. It literally glowed. I was tempted
to get out my 4x5, to make sure I really captured this scene.
But, after a few minutes, a sudden hail storm brought an end
to the photography here. This image has some very, very fine
branches, with intricate ferns in the foreground—a real
challenge for digital capture. Tons of fine detail everywhere.
My 24x30 print from this file was everything I had hoped for…
But Wait—It Gets Better…
My friend Uwe Steinmueller, editor of this website,
dropped over to see these prints, and I also lent him the raw file
from this scene. He is the master of Raw development, and I wanted
to hear what he thought of these P45 files. A day or two later
he emailed me a very small section of this image, developed two
different ways. I couldn’t believe what I was seeing—I
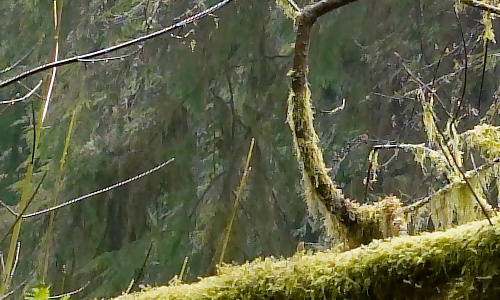
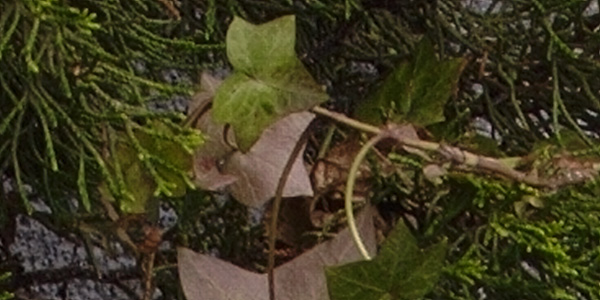
had to try it myself, which you see below, first developed in Capture
One, with default settings for noise reduction and “soft
look” sharpening at 25/3:
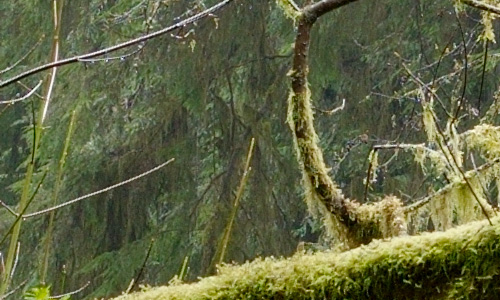
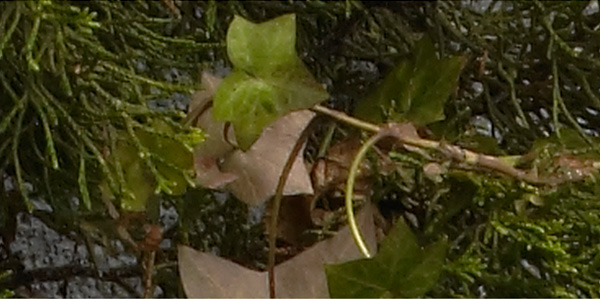
And with “Raw Developer” at their defaults,
with “hybrid” sharpening:
I wasn’t even aware of any other way to develop
P45 files! (Adobe Camera Raw doesn’t support them (yet)).
Uwe mentioned some discussion that Capture One did some very aggressive
noise reduction with long exposures, resulting in low noise, but
also loss of fine detail in areas of low contrast. You can certainly
see that effect here—the fine detail in the evergreen boughs
is quite obscured. This image required an 8 second exposure. This
also explained what I was seeing with my fern image (a 6 second
exposure). The high-contrast details remained, but the low-contrast
areas went blank.
How would my Fern image resolve in a 30x40 print?
Here are small sections from a 30x40 print file, upsampled in
Photoshop (with
bicubic smoother). First with Capture One (with minimal noise
reduction, and default sharpening):

And Raw Developer, all defaults, with “hybrid” sharpening:
Raw Developer vs. Capture One
With an image exposed
at a fast 1/250, I found much less difference between Capture
One and Raw Developer. But, the Raw Developer
files did show slightly more detail in smooth areas. It has
a look greatly resembling what you would get from film—including
what appears to be “grain” (some might call it
noise). I do not find this objectionable. With my landscape
work, exposures
are generally in the range of 1/2 second to longer, so this
smudging of fine details with Capture One is a big concern
for me. Setting
Capture One to the lowest possible noise reduction results
in a just-perceptible improvement over the default setttings.
But,
there’s still smudging. A friend of mine, Karl Kroeber,
who been shooting digital for 5 years, tried out Capture One
with his Canon EOS-1Ds. He reported small differences between
it and Adobe Camera Raw, but felt that Capture One was more
suited for the “smoother” results that portrait
photographers want.
The sharpening controls in Raw Developer
are excellent, with
a choice between “unsharp
mask” and “hybrid” (which uses some high pass/low image convolution
filters, not unlike Photoshop’s “smart sharpen”). These adjustments
are very controllable and graduated. I find Capture One’s sharpening
to be too strong, even with “soft look,” and has a tendency to
blow out highlights even at the lowest settings.
I am very impressed with Raw Developer. From www.Iridientdigital.com, you can
download a free working demo that will leave a small watermark. If you like
what you see, it only costs $99. It is not as sophisticated as Capture One
in its
organization of files and workflow, but you can’t argue with the results.
Rematch! P45 vs. 4x5 Velvia
I am even more impressed
with what the P45 back can capture. In January, www.luminous-landscape.com ran a comparison I did of
this back against 4x5 Velvia film. I have now redone that comparison
using Raw Developer. We now have camera profiles for the P45,
so the colors are now closer. Since the framing of the test
scene was not completely exact with the different cameras, the
resulting
sizes here are different. But in each case, I have upsampled
each file to 40 inches on the long side in Photoshop with bicubic
smoother. Each was sharpened with USM to taste. Remember, these
are small sections from a 30x40 print file. And, the differences
you see on screen here will be minimized in the resulting print.
4x5
film
P45
in Raw Developer
P45 in
Capture One
I find it interesting that the Raw Developer file
shows slightly more detail than film in some of the leaves.
I have confidence now
that I can make a 40x60 inch print from my P45 that will be quite
comparable to what 4x5 film
can offer.
5/4/2006 Update
PhaseOne does listen to their customers. With the
latest version (3.7.4), they have changed (quoting the release
notes) "the reference point (zero) on the Noise Suppression
slider...to include more details". And it can now provide
fine detail on long exposures on a par with Raw Developer. I still
think Raw Developer provides more "film-like" results
with slightly fewer artifacts, but it is quite a subtle difference
now. You would have to make an awfully big print to see these differences.
I have included a new jpeg made with this latest version of Capture
One. I had the noise reduction and sharpening off, and added some
USM in Photoshop (which seemed to work better than the default
sharpening in Capture One).
New version with C1 3.7.4
Note by the editor
Through the picture taken by Charles
Cramer we found the bug and luckily Phase One fixed it. Unfortunately
Phase One did not find it nescessary to contact us and inform us
about the fix. Notes by the editor
|


