| |
|
| |
Digital Outback Photo Contest #014
Contest September 2004: Noise Removal Contest #2
|
| |
|
| |
|
| |
|
| |
Limited to 8 entries (8 entries
+ 1 extra, terminated) |
| |
|
| |
See also our other
contests |
| |
|
| |
A Note on Copyright:
This image can only(!) used in the context of this contest and the only
site that has the right to publish images is Digital Outback Photo. If
you want to use this image for any other purposes (e.g. marketing) you
can acquire a license from us. |
| |
|
| |
|
| |
There are no prizes for this contest as the evaluation
of the results can be too subjective. |
| |
|
| |
To share experience it is not enough
just to show the results. We need precise step-by-step descriptions
of all image editing operations that had been performed. That is why
we need to limit the used tools to the ones that are available at Digital
Outback Photo (and they have to be available for PC or Mac):
- Photoshop (this is the standard image editor we use)
- Commercial and non commercial noise and sharpening tools
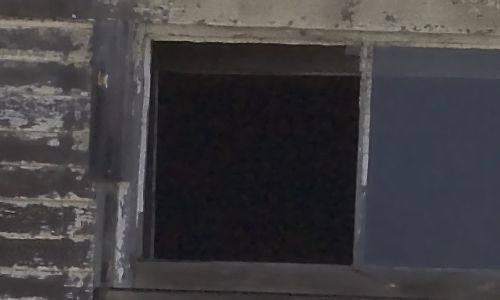
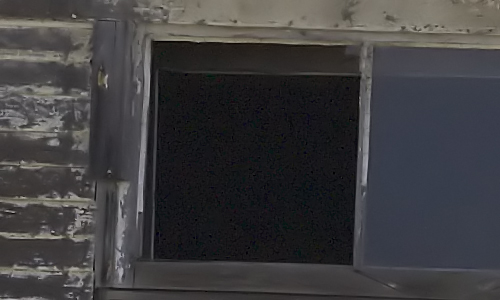
Photo was taken with the Canon 1D Mark II at ISO 1250.
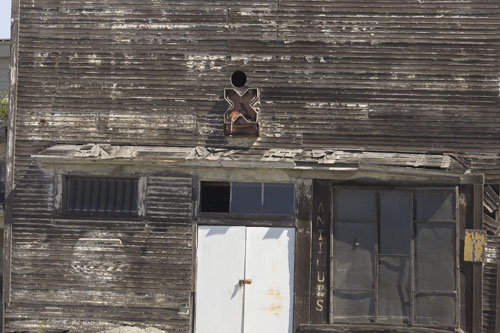
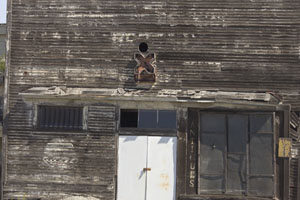
Alviso Grocery ruin

500 pixel wide crop (no sharpening and noise removal)
This photo was created using:
- ACR 2.2 (sharpening and noise removal to off)
Rules:
- It is your task to remove the noise and sharpen the crop shown
above. Don't be to aggressive to avoid an artificial look
- You load the cropped image (JPG, copyright Bettina & Uwe Steinmueller)
from here (about 150KB JPG at low compression 12)
- Use any noise removal and sharpening technique you like
- Describe the process step by step
- Send only the instructions and the final sharpened image crop (JPG
8 in Photoshop) and your full name to:
contest@outbackphoto.com
- Do not change any colors or global contrast/brightness
- No
selective sharpening (like painting or color selection). Edge masks
are of course ok. We would like to see techniques that work also
automated.
- The final image has to be in Adobe RGB and RGB color mode (without
any layers)
|
| |
|
| |
|
| |
|
| |
|
| |
Note: As all photos should be in the Adobe RGB color
space it is recommended to download interesting samples and view them
in Photoshop on a profiled monitor and at larger magnification. |
| |
|
| |
|
| |
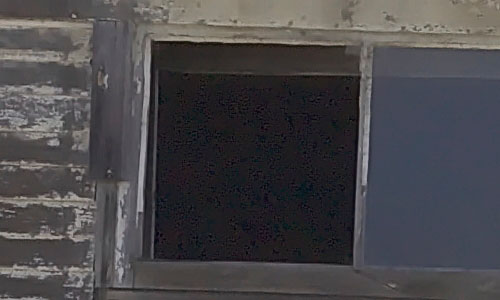
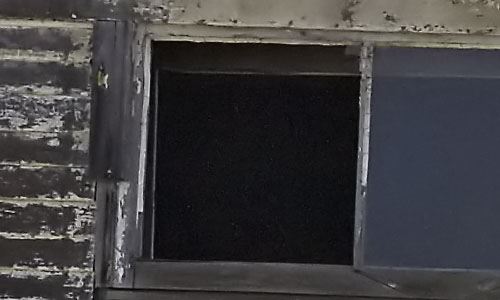
Sample Entry (by Uwe Steinmueller) |
| |
|
| |
- Sharpened with EasyS at
normal level, amount 250, 3D 50% and used with EasyS
actions
- Opacity of EasyS layer 60%
Note: We try only to remove part of the noise to avoid some sort of
plasticy look.
|
| |
|
| |
Note: The links point to our reviews or to the vendor
sites of various products. |
| |
|
| |
|
| |
|
| |
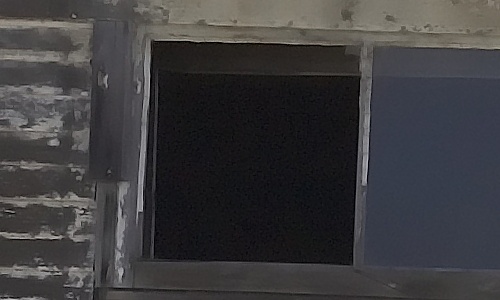
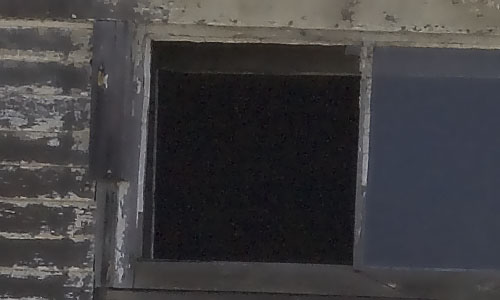
#1 John Connell |
| |
|
| |
|
| |
|
| |
|
| |
|
| |
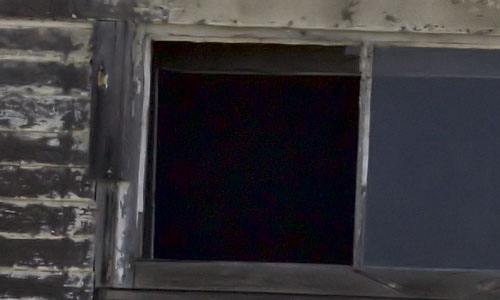
#2 Henk Backer |
| |
|
| |
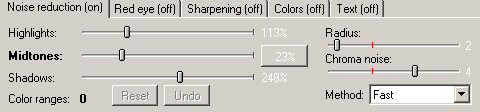
-
To remove noise from your image I used NoiseNinja
2.0.2. I first applied "Full auto profile" and then the
filter settings according to screen shot below:
|
| |
|
| |
|
| |
|
| |
#3 Thomas Doll |
| |
|
| |
|
| |
|
| |
|
| |
|
| |
#4 Mitch Weintraub |
| |
|
| |
-
convert to 16 bits & lab color
-
run neat image as plugin filter
-
select black area
and auto profile
-
set noise reduction amounts to 80% for
the
high,mid,low freq sliders and 90% for Y,Cr,Cb
sliders
-
convert to lab color
-
elect lightness channel
-
using levels, set mid
slider to 0.8
-
select all channels,and duplicate layer
-
select
lightness channel on top layer,
and run unsharpen mask with 40%, 40 radius,
0 threshold
-
select all channels and blend with
50% opacity
-
select all channels,and duplicate layer
-
select
lightness channel on top layer,
and run unsharpen mask with 400%, 0.3 radius,
0 threshold
-
select all channels and blend with
50% opacity
-
select lightness channel, run curves,
and darken very low intensity regions
-
convert to rgb color & 8bits
|
| |
|
| |
|
| |
|
| |
#5 Frank Liskaser |
| |
|
| |
-
Change to 16 bit
-
Apply NeatImage via Photoshop plug-in
-
Sharpen with Focalblade,
Expert Mode - medium sharp, medium details
-
Revert back
to 8 bit.
|
| |
|
| |
|
| |
|
| |
#6 Doug Wickens |
| |
|
| |
-
Apply local contrast via USM - Amount = 20% Radius
= 50 pixels Threshold = 0
-
Apply high pass filter
-
Apply Photokit Edge Sharpen 1
-
Apply Photokit Luminance
sharpen 1
-
Apply Neat Image noise removal
-
Apply Photokit
Luminance
Sharpen 2
-
Apply
Neat
Image noise
removal
|
| |
|
| |
|
| |
|
| |
#7 Brian Lee |
| |
|
| |
|
| |
|
| |
|
| |
|
| |
#8 Ettore Leiduan |
| |
|
| |
|
| |
|
| |
|
| |
|
| |
#9 Glenn Mitchell (Extra entry as an early
email got lost) |
| |
|
| |
-
Capture Sharpening using my TLR Sharpening Toolkit.
-- Highpass Filter Sharpening 15 pixels using a Luminosity Edge Mask
-
Neat
Image on a Merge All Visible layer. (alt-ctl-shift-n-e)
-- Use black window for fine tuning.
-- Use gray window for fine tuning.
-- Low noise 25%, Cr 60, Cb 60
-- Created Conceal All layer mask for Neat Image layer.
-- White paint for window
-- 50% gray paint for gray siding
-
Output Sharpening using my TLR Sharpening
Toolkit on a Merge All Visible layer. (alt-ctl-shift-n-e)
-- Single contour USM (260, .7, 2)
|
| |
|
| |
|
| |
|
| |
Thanks to all participants (including all submissions
that may not get published). |
| |
|
| |
|
| |
|
| |
|
| |
|
| |
|
| |
|
| |
|
| |
|
| |
|
| |
|