This time we show how we use the different histograms
during the editing process.
1. Histogram in the RAW converter (or "soft is beautiful")
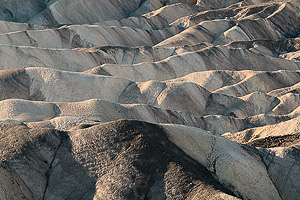
Here is our start image right out of RAW Developer:

Soft image from RAW Developer (Death Valley Zabriskie Point)
Many users get afraid of soft images.
But in reality this is likely the best staring point as you have no
clipped data and can easily improve it later in Photoshop.
Note: We would have
no problem getting closer to our final image also in RAW Developer
but our workflow works best with some sort of soft images.
Here is the histogram in RAW Developer
(one of the most powerful histograms we have seen):
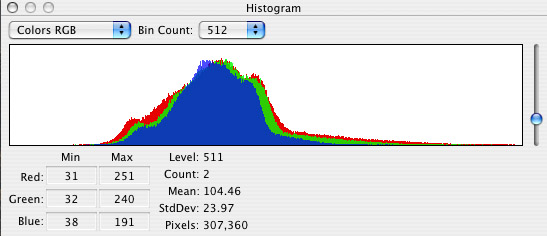
RAW Developer Histogram
At some point we may feature the RAW
Developer histogram by itself but here we want to show the key properties
for this image at hand.
1. The "Max" values show no clipping
in any of the channels
2. There is a wide gap in the shadows
that we have to deal with later
3. RAW Developer allows histograms with
256, 512 and 1024 levels. We normally use 512
This all means we get a 16 bit image
in Photoshop that holds all the data in the original file and likely
no data clipping at all.
2. Histogram in Photoshop CS2
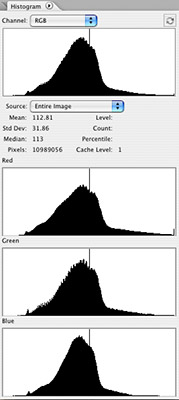
Here is the histogram of the above image
in Photoshop CS2:
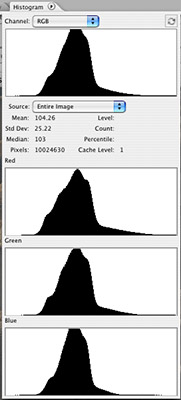
Histogram in CS2
This histogram confirms that no data seemed to be
clipped.
Unfortunately this histogram setting needs a lot of
space on your monitor. One more reason to work in a good dual monitor
setup (use your old monitor as the second monitor, we use 2x 1600x1200
displays) or dock the histogram to the top.
Important note: The Photoshop
histogram is not always current and may provide a wrong impression
of the data. In this case Photoshop shows the following warning:

Warning about histograms not being current
Why is the histogram not current.
It would slow Photoshop too much down to recalculate the histograms
all the time. Just click on the warning sign and PS recalculates
the histograms. Only updated histograms help to make decisions
based on the histograms.
|
Now we run our favorite filter Enhancer on
this image (we do this virtually now on all of our images, but also
remember that we try to capture scene in soft light):
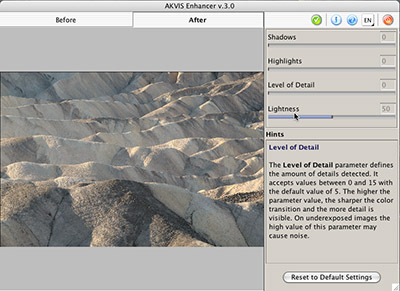
Enhancer settings
In many cases we use the detail settings
at 0. Enhancer still improves the local contrast a lot.
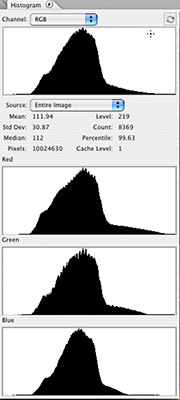
Now lets have a look at the histogram
again after we applied Enhancer:
After Enhancer
We make 3 observations:
- Little bump in the shadows which have not been there (we are not
sure that we could really see the effect in the image but want to
be sure it does not hurt)
- Spike in the middle (no ides what it really means)
- Minor clipping in the red channel (we try to avoid clipping all
the time)
What we do is restrict Enhancer to the midtones only (using DOP
Tonality Tuning Kit)
After this operation the image and histogram looks like this:
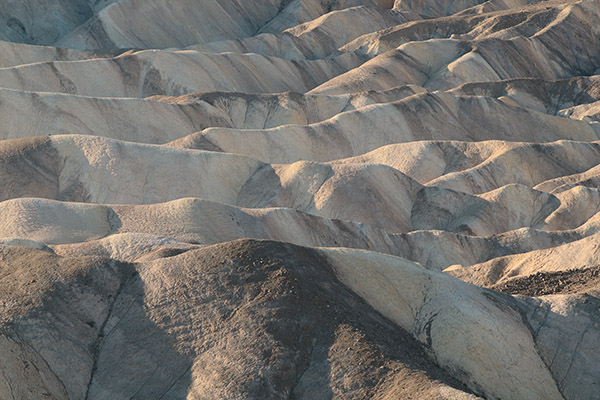
Image after Enhancer
After masking
The image is still soft but with a much better local
contrast. Using some sharpening, levels (black & white points and
gamma) and an S-curve we get our final image:

Final version
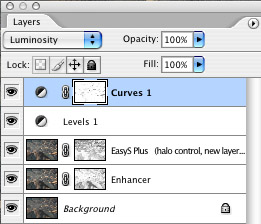
Our final layer stack
Note: We also used
an inverse highlight mask for the curves to protect again the highlights
from clipping.
We hope to make a good case for the essential use
of the Photoshop histogram tool.
|