Photographing moving water (here mainly cascades) is
both challenging and fun. There are many ways to skin the cat. Here is
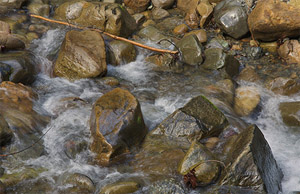
a shot from our book "California Earthframes":

Merced Cascades
Recently we wanted to check how well
Cascades would work using HDR techniques. The classic solution is to
use longer exposures (we like about 1/5-1/15 of a second for high speed
cascades like in the Merced shot above). But of course it depends on
your artistic goals how you would like to present the cascades. In
most cases it can be said that a completely freezing of the moving
water does not add to the picture.
So we started photographing cascades
with multiple exposures:
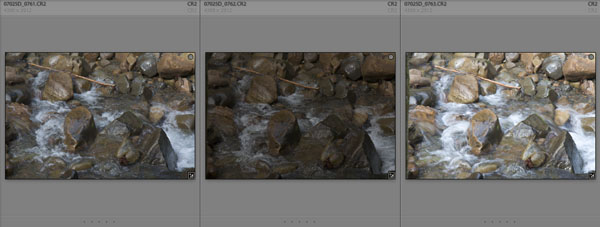
3 Exposures
We experimented with bracketing of about
(-1, 0. +1 EV).
Note: All shots were
done into the shadows. Still you will be surprised about the dynamic
range of that scene. Remember you also have bracketed single
shots
The first thing to do is to check whether
the single shots can be used by themselves. Bracketing was always a
proven technique to get the best possible exposures. Now you can use
this technique and get shots for HDR at the same time.
If the +1 EV shot would have no data
clipping then it would be the best choice because it has the most open
shadows with the lowest noise.
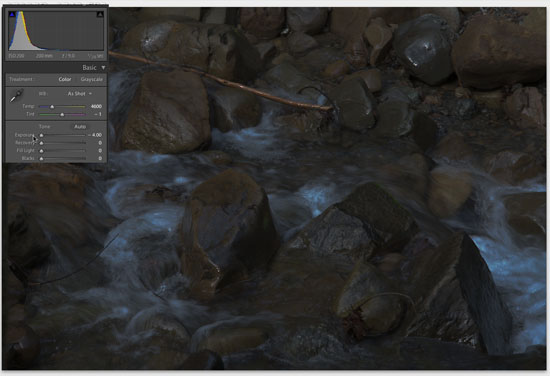
Exposure set to -4 in Lightroom for the +1 EV shot
We set the exposure slider to -4. If
we feel there are still hot areas than we discard using this exposure.
In this case we we don't think the +1 EV is usable. This leaves us
using the 0 EV exposure. We then adjust the settings in Lightroom to
get a very soft version version with the following property:
- Absolutely no clipping in the highlights
- Shadows nicely open and as little clipping as possible
- We then do the final tuning in LightZone
- We set the Point Curve to "linear" and also the Blacks slider
to 0
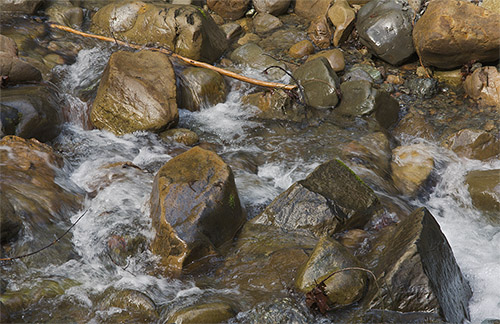
Single shot version from the 0 EV version (out of LightZone)
The problem we see is that the water
of this single shot picture makes the photo look a bit "busy". The HDR version
We then combined the 3 exposure in
Photomatix (2.4.
Beta 6) to a HDR image and then tonemap the HDR file in Photomatix:
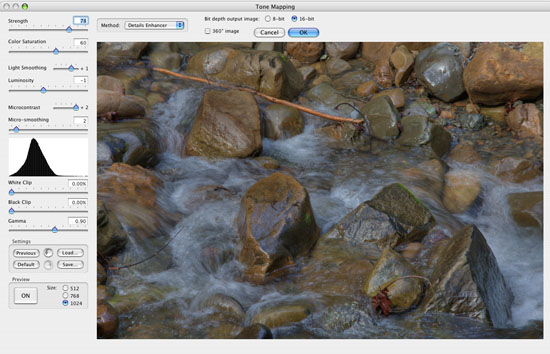
Tonemapping in Photomatix
Again our goal is to keep the file soft
as in Lightroom. The final tuning is again done in LightZone.
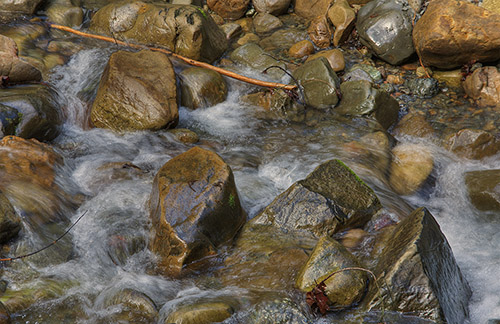
Tonemapped HDR file (out of Photomatix and LightZone)
Interesting that this image looks way
less "busy". Now it maybe a matter of taste which version you like
best. But this is not really the case. Stay tuned.
Combining the single shot and the HDR
version in Photoshop
We put the single shot version and the
HDR as two layer on top of each other in Photoshop. You also need to
align both layers perfectly. Then we blend the top layer to our taste:

58% HDR on top of the single shot version
This way we can bring back some sparkle
from the single exposure shot.
What about HDR and moving objects?
As you may know moving objects are still
a big issues for HDR (called ghosting) and water is moving big time.
But the water is moving organic and does not have any edges. We find
that
HDR
can
produce
nice cascade shots. Of course there is a lot to explore in the future.
As a nice side effect we also get low noise and open shadows.
Comparing
crops of all three versions We
show how different the water looks in the three versions:
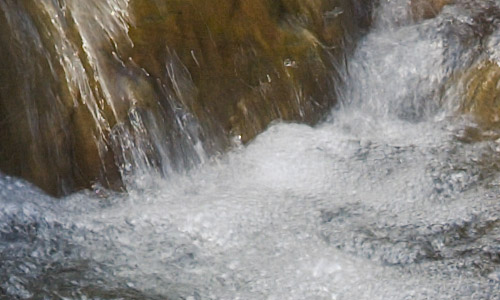
Single shot version (0 EV)
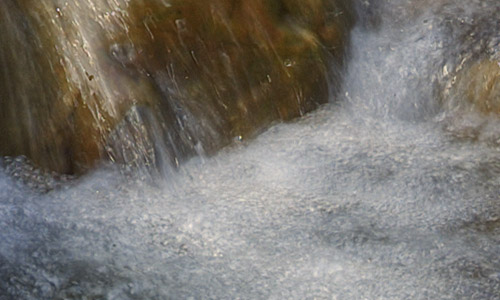
HDR version
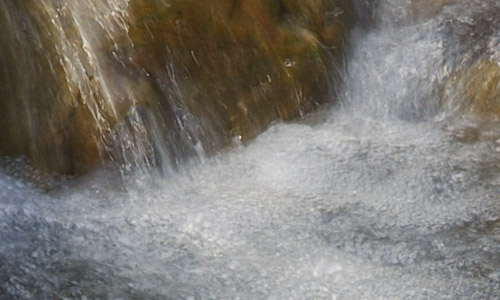
Combined version
Conclusion
We plan to use more and more bracketed
exposures with the following benefits:
- Pick an optimal single exposure
- Explore the HDR version
- Have multiple exposures for the future as we know that HDR
tools will evolve
We also want to ask camera manufacturer to improve the bracketing
features in their cameras:
- Allow at least -2, 0, +2 bracketing (Canon 5D and 1Ds Mk. II
allow this)
- Allow to setup at 5 shots for the bracket (5D does not allow
this, while the 1Ds Mk. II can do it)
- Allow exposures beyond 30 seconds without using "bulb". We
ran into this limitation quite often in the past.
Note:
Very often you may have a TIFF file tone
mapped in Photomatix and then ask what were the parameters during Tonemapping.
The good news is that Photomatix stores the settings in the XMP section
of the TIFF file:
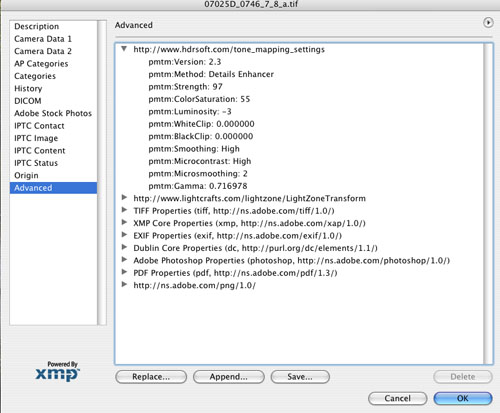
XMP info on Photomatix in Photoshop
|