|
MyDigitalWorkshop @
|
| Home | News | Nature | Places | Reviews | Workshop | Resources | Galleries | About |
|
Getting good Photos with the Nikon D1 by Uwe Steinmueller (12-21-2000) |
| Equipment |
|
| Capturing Photos with the Camera |
| We only shoot photos in NEF format (on 4x340MB IBM Microdrives, they are not problem free but is works mostly ok and CF cards would cost 3x as much for the same capacity). We also try to use prime lenses because no sharpening can compensate for poor lens performance (sample image using AF-S 80-200 f/2.8). |
| Transfer to PC |
| We use the PC card slot on the Vaio to copy images to the hard disk. Before the images get deleted on the Microdrive we will have at least 2 copies on two different hard disks (and finally CDs) of the original NEFs. Using the PC card slot is probably the fastest way to copy large image quantities (6 minutes for 340MB). |
| Creating sample photos |
| I have set up a macro in Photoshop (using Bibble) to convert the images in batch (to 1000 pixels in the maximum dimension and JPG 7 compression to save space) so that we can have a first look for the content. We then browse through the images and select those which we find most interesting for further work. We also keep these photos for further browsing. |
| Converting NEF files and Adjustments |
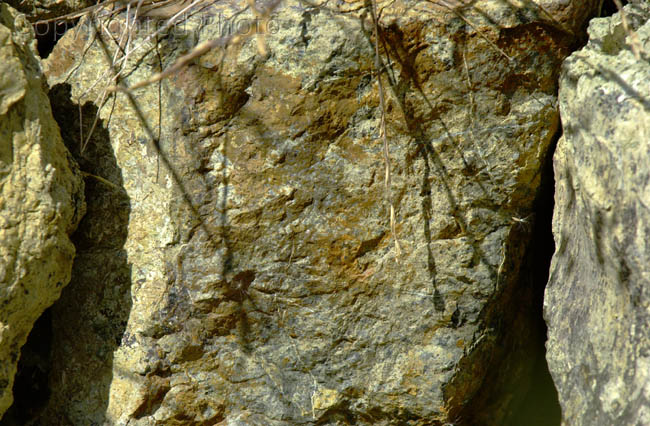
| Now I will explain all steps as detailed as possible using a sample image. |
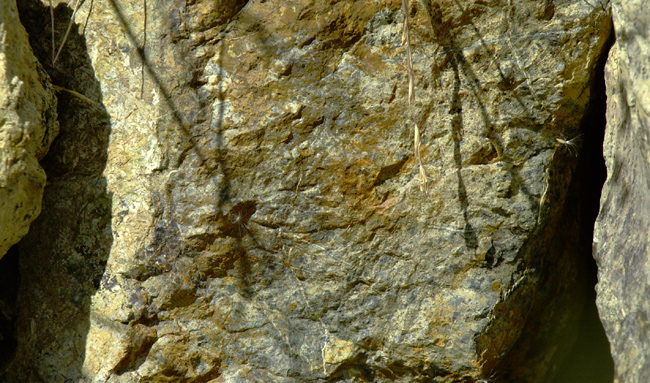
| We took this photo because we like these earth
colors on that rock and we believe that the spirit of these colors is present
in the final image. That you can do this exercise yourself we provide the
original NEF here (I
remains copyright Uwe Steinmueller). |
| For opening the files in Photoshop I browse the NEFs in ThumbsPlus (it can only show the small in the NEFs embedded thumbnail JPG) and use drag and drop to transfer it to Photoshop. The NEF file is then opened by the Bibble 2.0 plug-in and the following crucial input dialog gets displayed |
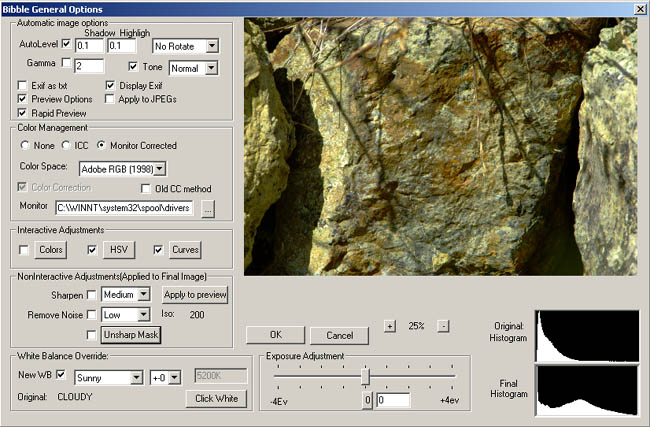 |
| Many of the settings stay constant that is why I only mention the things you have now to decide. My usual settings for "AutoLevel" are "0.1/0.1" and get rarely touched. The "Tone" setting is very important. "Normal" is as its says the normal setting. But if the highlights are in danger to get blown out I might use "low" or even turn it off and use "Gamma" set to "2.2". |
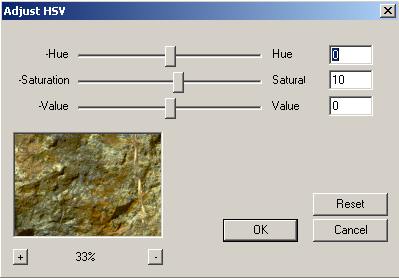
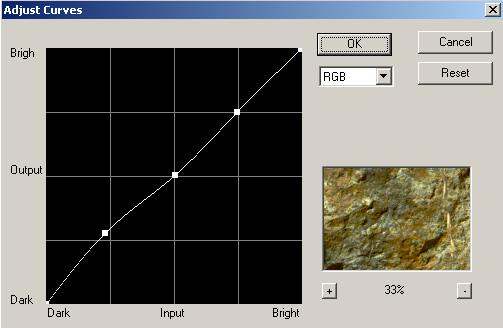
| In the section "Interactive Adjustments" I use two settings. |
|
|
|
|
| In the next section I might use "Remove
Noise" if the ISO is higher than 200 (this is my standard). |
|
Our cameras are always (outdoors) set to "CLOUDY" and I than
correct it in Bibble (lending more to the warm side). |
|
If the image needs some "Exposure Adjustment" (this
one did not) this is the right place to perform the correction while checking
the small useful histograms. Now it is time to click "ok" and
wait about 10 seconds until the photo is loaded into Photoshop. In Photoshop
I probably will do some light adjustments with "Levels", then
sharpen in 16 bit color depth using "Quantum Mechanic Pro" and
finally set the image to 8 bit mode. We now have this result photo. |
 Step 1 |
|
The final step was then cropping the image. After some iterations you can do this process very fast. If there is an image where you don't succeed also consider that it might no be worth it and remember what you might do the next time better while taking the photograph. |