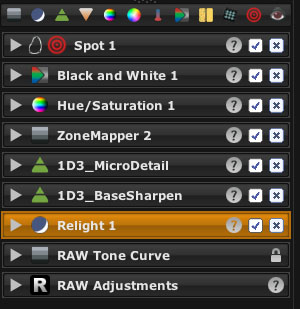
Since we started using LightZone (December of 2005) we missed a way to perform selective color corrections. With the introduction of LightZone 3.1 the wait is now over (read our LZ 3.0 review).
Instead of making a dedicated tool for color corrections LightZone created a way to use the new features in a way more general manner.
For image editing there a basically 4 possible ways to create selections or masks:
- Geometric areas (in LightZone very well implemented as Regions)
- Selection by color ranges (new in LZ 3.1)
- Selection by luminosity range (new too in LZ 3.1)
- Painting masks (this method is somehow at odds with non destructive editing in general). We avoid this method whenever we can to stay in a pure nondestructive workflow.
We explain the new feature in the following sample session
Sample Session
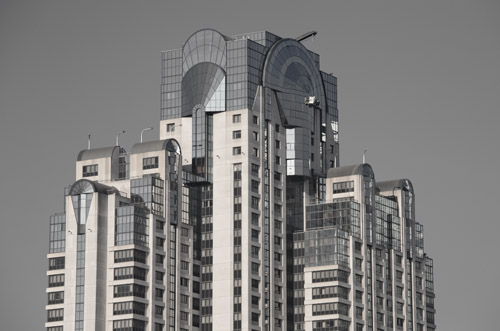
We use the same image and goal as we described here. We won't cover all detailed steps but show where the new color/luminosity selection make a big difference.
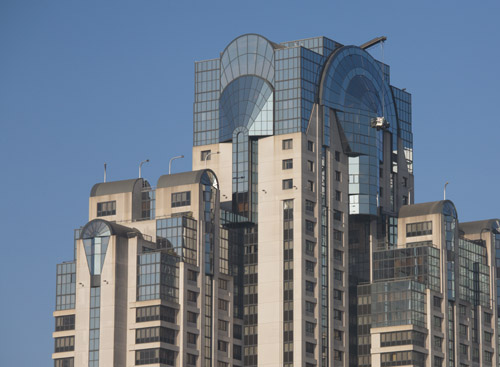
Start image (only the LZ RAW tool applied)
One of the key goals was to allow selective color correction but also to make the features more generalized.
For our colorized photos we often don't want that the final image shows any blue of the sky (artistic decision) or we want to tune down the blue sky in other images.
De-saturate for a color/luminosity range
LightZone 3.1 allows now two different types of selections:
- The classic LZ Regions
- The new color/luminosity range selection
Note: Both types of selections work orthogonal. This means you can restrict a color range selection further by using regions.
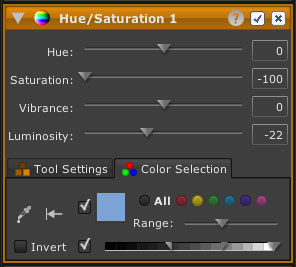
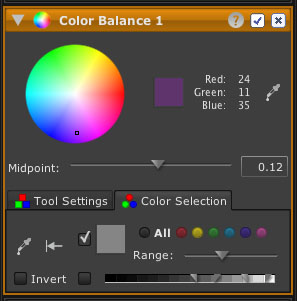
Here is a detailed description of the new Color Selections:
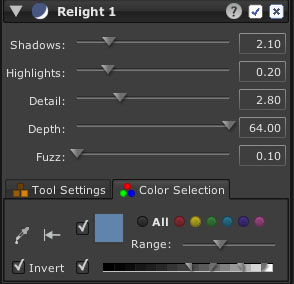
Color Selection
- First row defines the color range (range of hues)
- Eye dropper allows to select the base color
- Next button allows a reset
- The check mark can enable/disable the use of the color range (This way you can only use the luminosity range from the second row, also helpful for testing the effect)
- Color square shows the base color
- Range allows to limit the range of colors effected (you can even visualize the created mask)
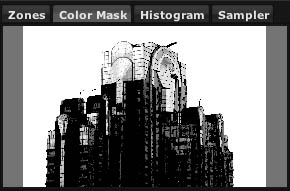
LZ 3.1 shows the color mask
- Second row defines mainly the luminosity range
- The first checkbox allows to invert the mask (we show a sample below)
- The second check box enables/disables the luminosity range
- The sliders (4 small triangles) allow to define the luminosity range including a feathering area)
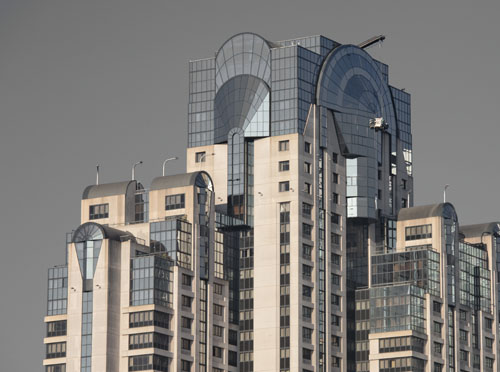
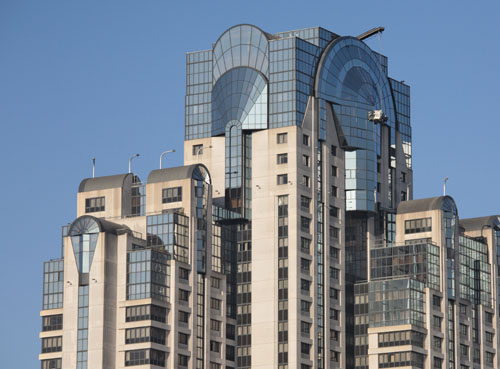
Photo after de-saturating some of the blue areas
We hope you realize that this is a very powerful way to perform selective color corrections. Also remember all is nondestructive and can be tuned later.
Note: As we covered in earlier reviews of LightZone we think that the LightZone Styles are a very important tool for workflow efficiency. If you create new Styles these Styles will also include the color selection. The next image of the same type is easily corrected using the previously saved Style.
By no means are Color Ranges limited to pure color corrections. Here is an example where we use the Color Range for the Relight tool:
Relight tool with inverted color selection
Even if LightZone's Relight Detail enhancer does not amplify noise as much in a the sky like other other tools of this kind we prefer not to use the Relight effect on the sky. This is very simple to do.
- Click with the eye dropper on the sky
- Tune the range for color
- Tune the luminosity range
- Invert the mask
After selective Relight
Note: The Relight layer is actually below the Hue/Saturation layer in our example. We wanted to show selective color correction first because this is the primary use of Color Ranges.
Here is a short list of other ways to use Color Ranges:
- Limit noise removal to the shadows
- Limit Sharpening to the midtones
- Apply white balance to different tonal ranges
The final step in our example is a B&W layer:
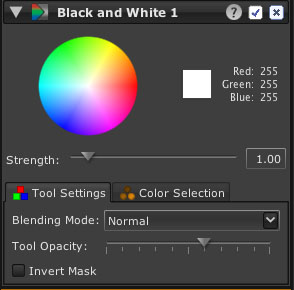
B&W at 60% opacity
We apply the B&W tool at 60% opacity to get the colorized effect we like:
Final Version
FYI: Our final stack in LZ
The new Color Range selections make LightZone at least one magnitude more powerful. We are so happy that the wait is now over and that LightZone delivered a version that was well worth waiting for.
Note on LightZone Batch: Because all these operations are parametric you can apply the corrections for one image to many other photos. This is where workflow and saving time starts. With all other tools we know you need to repeat all needed steps for each image again.
Some Creative Example
During some tests we screwed up the white balance for the following photo. This got us thinking how to improve on it in LightZone.

Original photo
We then used the Color Balance tool to get a new effect.
If we apply the Color Balance to the full image the colored chairs get effected. That is why we created a Color Selection for the gray background and disabled the luminosity selection. Here is our result:
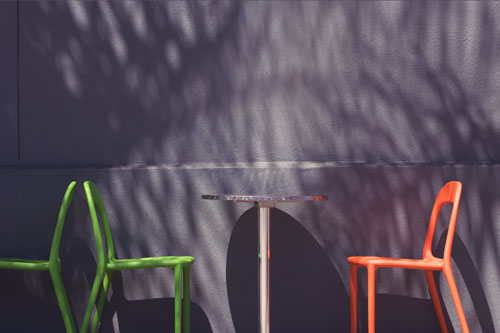
Tweaked photo
You can actually tweak the effect by changing the opacity of this layer. We settled with 50%.
Some other changes in LZ 3.1
- Improved Crop tool
- Improved Rotating
Conclusion
We think that LightZone 3.1 is a major update that brought LightZone to a complete new level. Well done!
Our list of wanted feature is getting much shorter now:
- CA (Chromatic Aberrations) removal
- Lens distortion corrections
- Perspective corrections
|


