DOP Detail Extractor V2
What is new in Version V2.0?
Version V2.0 has two main goals:
- Extract more fine details
- Protect the image from possible clipping
- There is only one method used in V2.0. This is based on method 3 in the V1.0 product.
Installation
The DOP Detail Extractor V2.0 comes as a Javascript file for Photoshop CS3 (we only support CS3 right nowdemo).
- DOP_DetailExtractor_V2.jsx (demo version is named: DOP_DetailExtractor_V2_demo.jsx)
Installing the script
The script needs to be copied to the Photoshop CS3 folder and here to Presets/Scripts. After restarting CS3 you should find the script under File->Scripts. If you do not find it there you did not put the script into the proper location.
Note: The free demo version can only handle images up to 2000 pixels wide. The commercial version does not have this restriction.
Using the DOP Detail Extractor
Using the script
Using the script is simple. Best you have the top layer selected while working with the Detail Extractor tool. Open the script from File->Scripts
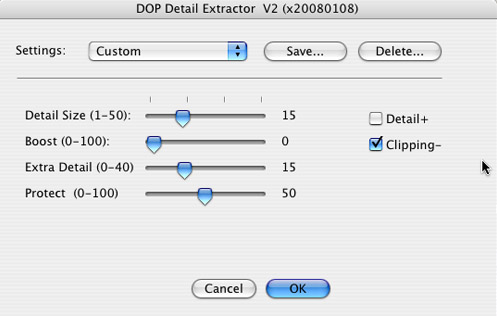
The Detail Extractor V2 only provides one method with 4 sliders and 2 optional features.
What are all these parameters?
- Detail Size: Granularity of the detail to be enhanced
- Boost: Only needed if you use strong settings to amplify the effect
- Extra Detail: Can pull out quite a bit more detail
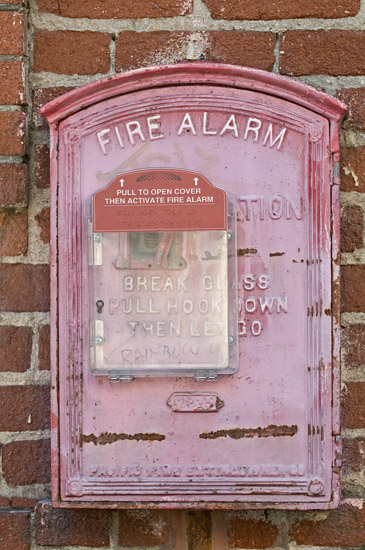
- Protect: If you use the Detail Extractor V2.0 with protect at level 0 you may see some clipping in the highlights and shadows (like in Detail Extractor V1.0). Protect concentrates the contrast more to the midtones and helps to avoid clipping
- Detail+: If checked the effect of Extra Detail gets enhanced (even more detail can be extracted).
- Clipping-: If checked the image gets mapped into the range 10-245. This means there are no clipped extreme highlights and shadows (we have this option almost always on).
If the effect is too strong you can do two things:
- Lower the opacity of this layer
- Run the filter again at lower values for Detail Size and Extra Detail.
Why can you select more extreme values? We are sometimes intentionally going over the top with local contrast to archive a so-called “grunging” effect.
http://www.outbackphoto.com/CONTENT_2007_01/section_hdr_and_tonemapping/20071101_PM_Grunge/index.html
After you run Detail Extractor V2.0 your will get a new layer.
The layer name shows all the settings used:
Example:
DOP_Detail_R15_B0_D15_P50_d1_c1
R15: Detail Size 15
B0: Boost 0
D15: Extract Detail 15
P50: Protect 50
d1: Detail+ checked
c1: Clipping- checked
Presets
You will find that images from a camera model and of a certain style require all the same settings. That is why we support named presets.
You can save named presets of any settings you like:
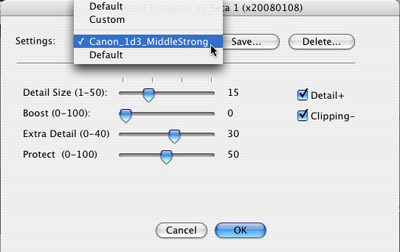
You can save, recall and delete presets.
Workflow Tips
- It is wise to sharpen very little before you use the Detail Extractor. All halos you have created before will get amplified.
- If the enhanced image shows too much noise remove the noise from the shadows before running DOP Detail Extractor.
- If the result still shows clipping then use a layer mask on the resulting layer (e.g. DOP Tonality Tuning Kit V2.0)
- Although Detail Extractor seems like sharpening it is not a replacement for proper sharpening. But you will need to sharpen at a much lower level.
Samples
Here is what we show in our samples:
For all sample crops we perform the same process:
1. We convert the RAW file in ACR 4.3 with very low sharpening (to avoid even light halos as much as possible):
- Amount: 61
- Radius: 0.5
- Detail: 0
- Masking: 0
2. We then use Detail Extractor V2.0 at the described settings
3. Add some minor sharpening with EasyS Plus (remember that Detail Extractor is not a replacement for final sharpening.
Best you download the layered 16-bit TIFF crop files to check and try yourself (using the demo version). Doing is believing!.
Sample #1
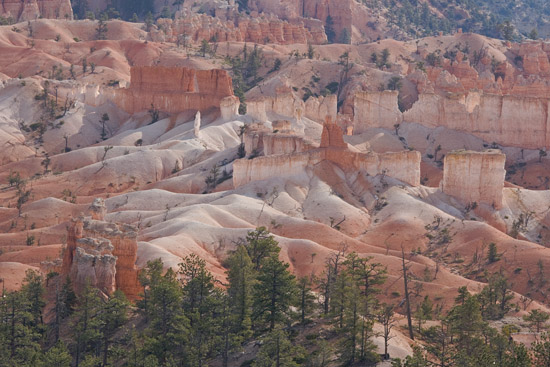
ACR4.3 and EasyS Plus processing only
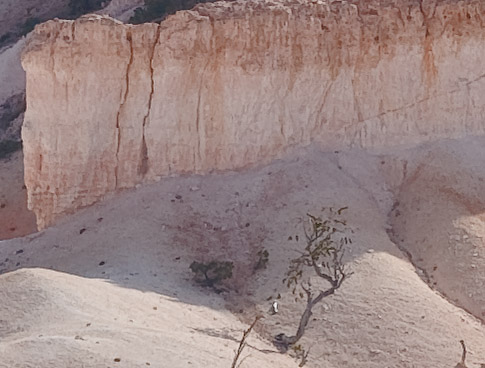
DOP_Detail_R15_B0_D15_P50_d0_c1 (default)

DOP_Detail_R15_B0_D15_P50_d1_c1
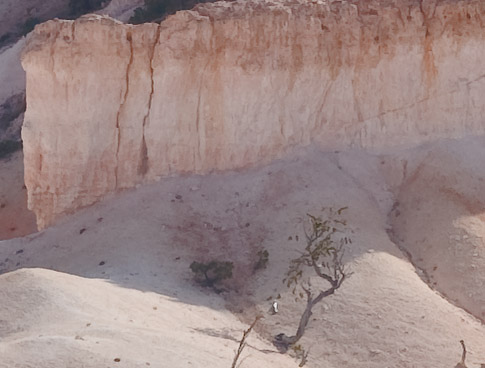
Sample #2

ACR4.3 and EasyS Plus processing only

DOP_Detail_R15_B0_D15_P50_d0_c1 (default)
DOP_Detail_R15_B0_D30_P15_d1_c1
Credits
Thanks again to Chris Russ for his help and inspiration. We will continue to work together to get you the tools you need.
How to order or get a Demo
You can order DOP Detail Extractor 2.0 or get a free demo version from here.
|


