We checked out digital backs in the past (last year the Phase One P45). We look at digital backs and medium format cameras from the perspective of available light photography (Landscape, Urban Scenes, ...). The new P65+ back featured a 60MP sensor (compared to 21/24MP with top DSLRs).
Why would you want to use a medium format camera that is:
Heavy
Big (but more compact compared to 5x4 view cameras)
Expensive
The answer is: Detail, lots of detail. Why would you need that much detail? Clearly if you print details scenes at 20" or even bigger you need lots of detail.
Some may argue that these backs also reproduce colors better due to a higher bit depth. All we can say in our brief test is that the results look very good to us in terms of colors.
We had the P65+ only for a very short period. All the photos we shot were at ISO 50. Why did we not try higher ISO? While these backs got quite a bit better on high ISO you get the best detail at lowest ISO values. If you pay a lot of money for extreme detail you want to get the most detailed images possible.This means ISO 50 would be most often used. It is good to know that the P65+ can produce nice images at higher ISO but this is not its core domain.
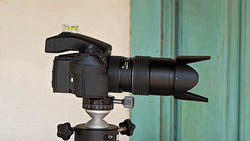
OT: Some will ask about the ball head(Burzynski Ball Head) we used:
We used the Phase One camera (essentially a Mamiya body) with the Mamiya 75-150mm zoom. This digital lens has a great reputation and is our preferred general purpose zoom for the Phase One camera. Essentially these backs very much operate like normal DSLRs. Here are some things to watch for:
Analyze the histogram after each shot (true actually for most cameras if you aim for optimal exposure)
Have spare batteries available for the back and camera
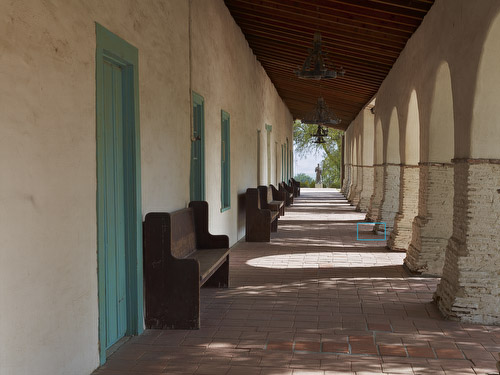
Sample 1
San Juan Bautista Mission (f/22, 1/6 sec, ISO 50)
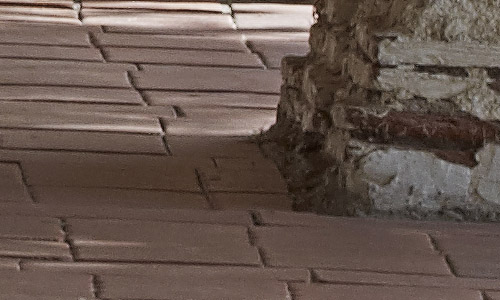
100% pixel crop of the marked area in the full image
Short video about this shot
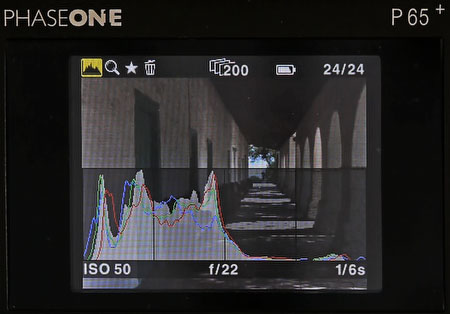
Here is the histogram shown in the video for your closer inspection:
If you look at the crop have in mind that this crop covers a tiny area of the full frame.
Note: We used f/22 for this photo to get the needed DOF. It may be already slightly diffraction limited. Still the detail is there and the P65+ covered the dynamic range of this scene very well (hard for many cameras).
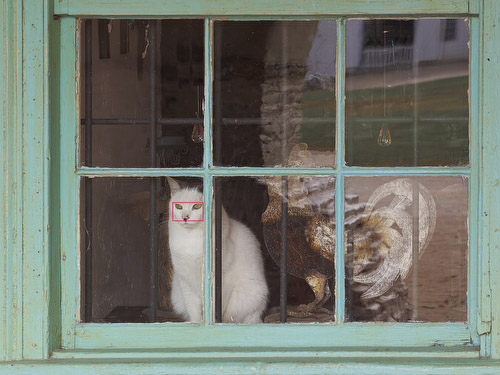
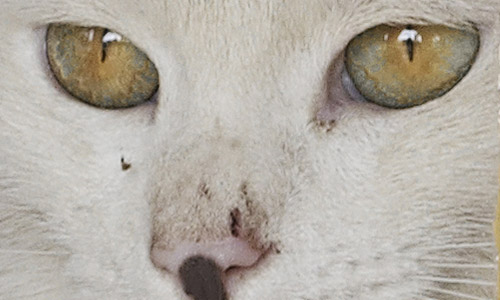
Sample 2
Cat in Window (f/18, 1/5 sec, ISO 50)
100% pixel crop of the marked area in the full image
If you check out the crop remember that this was shot at 1/5 second and the cat is behind a window. Good that the cat was cooperating :-).
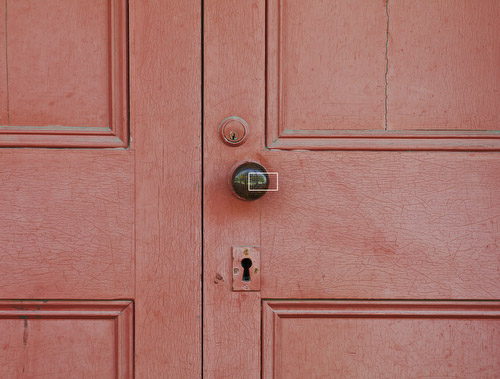
Sample 3
Door with Knob (f/16, 1 sec, ISO 50)
100% pixel crop of the marked area in the full image
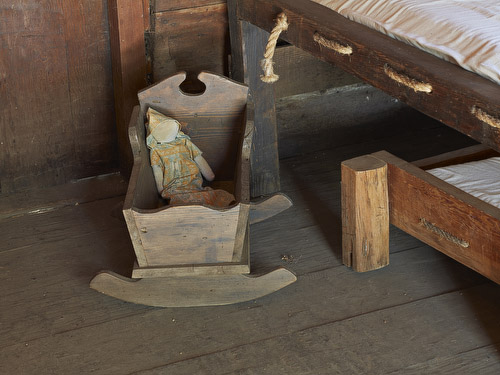
Sample 4
Inside the dark San Juan historic Cabin (f/18, 25 secs, ISO 50)
This is a difficult shot for any camera because the cabin is very dark. The P65+ did a very good job at a 25 second exposure.
Conclusion
If you need (or want) ultimate detail from a medium format digital back the P65+ clearly delivers the goods. Our personal style at this point works fine with smaller cameras at lower resolution. We then of course limit our print size to maximum 20" today. But we also know many situations where we would love to tap into the higher resolution of the P65+ (e.g. Dunes photos, Earthframe abstracts, ...).