Here is nearly the same workflow as in this article: Resolving Details. While we used in that workflow a P45 image with 39MP we this time show the same workflow using a Canon 1Ds Mark III image. As you will see the P45 might be the king of details but the Canon 1Ds Mark III is not that far behind.
Notes about the Canon 1Ds Mark III shot:
- ISO 250 (P45 was ISO 100)
- Handheld (P45 was tripod)
- We used the Canon 70-200 f/4 IS lens which shows more lens distortions and also a bit of CA (Chromatic Aberrations). The Mamiya 75-150 Digital lens is really a stellar performer with the P45. In our experience both defects (distortions and CA) with the 70-200mm f/4 can be fixed in Lightroom/ACR and PTLens.
- Both shots are slightly different but still give an idea how both systems performed (they have different apect ratio anyway)
Here are our usual steps (shown at with a 100% pixel crop, same as in our first article):
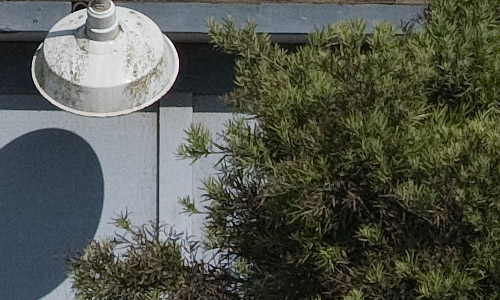
Step 1: Lightroom
We used Lightroom with no sharpening applied. Why no sharpening? We try to avoid to get even minor latent halos because the next steps would amplify them too much.

From Lightroom
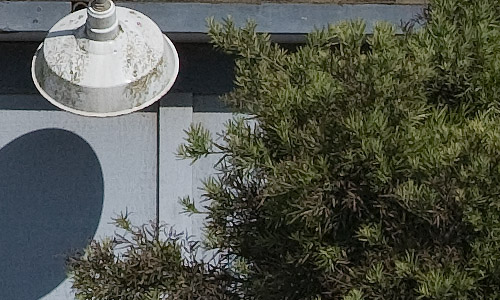
Step 2: EasyD
We use DOP EasyD Detail Resolver (read more here) at its default settings:

EasyD Default Settings
After using EasyD
The detail pops out and we can see more into the shadows (they look less blocked up).
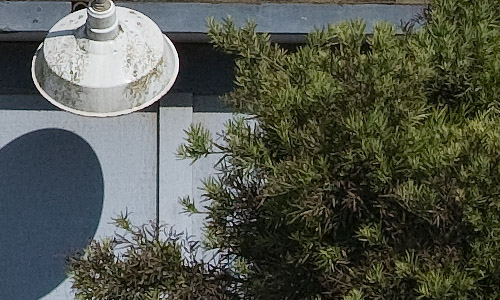
Step 3: EasyS Sharpening
EasyD is not a replacement for some sharpening but the images require much less final sharpening. We use our own EasyS sharpening tool (read more here) at a very low setting because it does not produce bad halos.
After EasyS at low default settings
We try to make an image as sharp as possible at the 100% pixel level without any major halos. We then hardly ever use any print sharpening. You may say that print sharpening could get even sharper prints. We like that often the inkjet printers soften the result to give the print a more natural sharp look.
Step 4: ColorMancer (optional)
Sometime we improve the contrast and saturation with the new Colormancer tool (read more here). This provides some more pop while preserving the color balance.
After Colormancer
Conclusion
The P45 shows more detail but the 1Ds Mark III is not that far behind. You have to print very large to see a difference. We printed both 30" wide and it was hard to realize a difference. The main difference was actually more a different level of sharpening and contrast.
|