Our regular readers know that we just recently got
the HDR bug. Actually we think that using multiple exposures were essential
to create our recent Alcatraz
portfolio.
Using at least 3 exposures for each single photo does not make your
workflow easier. That is why we want to share our experience for the
Alcatraz session (that day we shot about 103x3 images).
Getting the shots
We set the camera to a bracket for 3 exposures. Here are the requirements:
- Sturdy tripod and head
- Use mirror lockup in camera
- We use exposures of -2EV, 0, +2EV (the Nikon D2x can only do a
max of 1EV increments)
- Release the mirror
- Wait about 3 seconds
- Take the shot
- This of course 3 times (the bracketing is handled by the camera)
- We always use only manual exposure for any static objects
- Larger focal length has a great chance to get the images out of
alignment (can be handled in the software)
Processing the images (exposure merge)
To process that many images all manually would be very tedious, Fortunately
we can use Photomatix 2.3 (read
our review note) in batch mode.
Step 1: Converting your RAW files
We processed all of our images in a raw processor.
You can use the RAW converter you like. This example was done with
LightZone.
Step 2: Merging the images (in 3 shot batches) 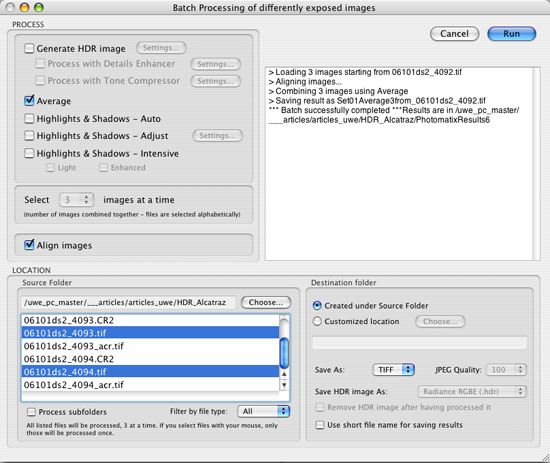
Photomatix Batch Dialog
Tone Compressor
There
are quite a few options to merge the files and you can actually create
them all at the same time.
 The following section got updated: The following section got updated:
- Generate HDR
- Detail Enhancer: : Powerful but you have
to be careful to get the best settings (choice
#1 for indoor shots, we avoid extreme settings).
- Tone Compressor: No halos, in many cases a
good choice (our choice #1 for high contrast outdoor shots).
- Average: Gives nice flat images. Flat is actually
nice because we can tune the images later in LightZone or Photoshop.
This option is our alternate choice to the other two methods.
Other settings:
- Align Images: It is better to check this option.
Cameras can shake quite a bit even on a sturdy tripod
- Save As TIFF: Will create 16-bit TIFFs (the only
option for serious work)
- Destination Folder: We normally use a different destination folder
Our 300 images (100 x 3) need some hours to be processed. Do some
other time in the meantime.
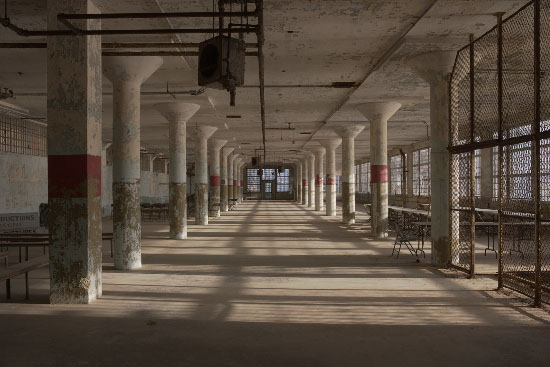
Image after "Average" exposure merge
Note of caution: If you run run these long batch
runs be sure to have enough disk space. Better not use the disk where
you have your system installed. We had this to learn last night the
hard way. Our Quad Mac system disk had a disk overflow and did not
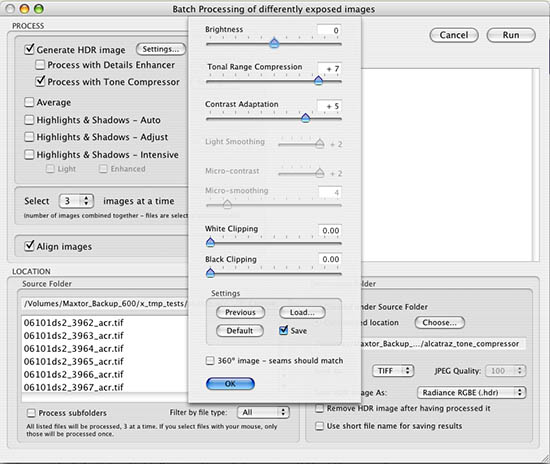
boot anymore. Kept us busy for a long night. Step 3: Tone Mapping
Because we use the "Average" option we cannot use the Tone
Mapper in the same run (maybe a nice feature for future versions of
Photomatix).
The following screen shot shows the settings we mainly use for batch
conversions.
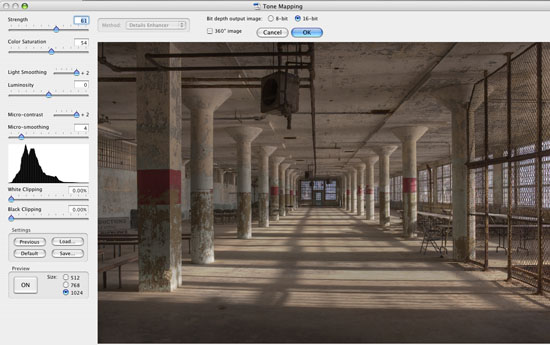
Tone Mapper in Photomatix
Photomatix allows also to process single
files (these are the result of step 2):
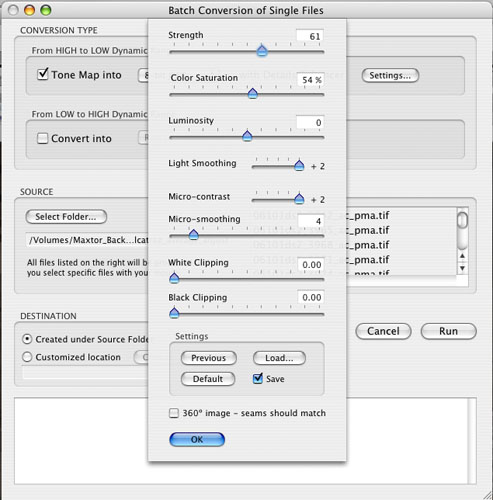
Single File Batch Processor
The above screen shot shows the Tone
Mapping options for our second batch run.
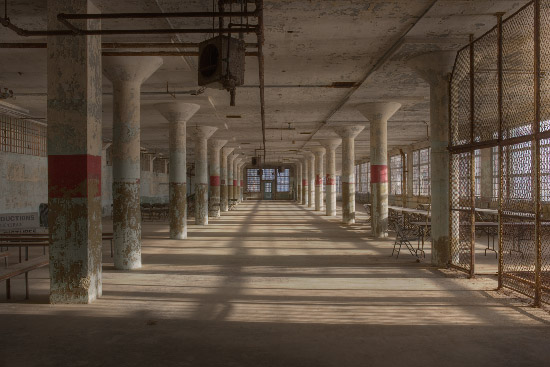
Image after Tone Mapping
Using Enhancer 5.0 (see
our review)
We finally also added a tuning step with
Enhancer which improved the local contrast even more:
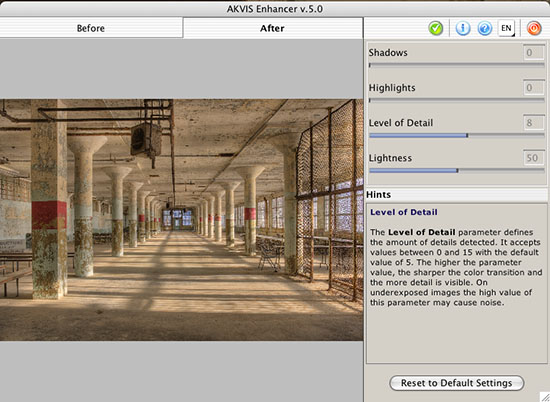
As we said for quite a time "Enhancer"
is really an excellent plugin. Version 5.0 support batch processing
(remove the old version completely)
Final Editing
We use LightZone 2.0 (read
our review)
for our final editing. 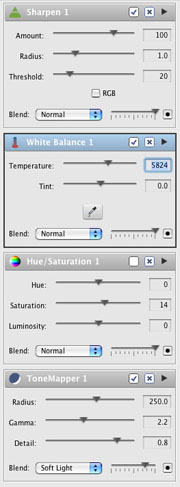
Tool Stack for color Processing
Here are some simple steps:
- ToneMapper: Improves the image most of the time
- Hue/Saturation: Boosting the saturation a bit
- White Balance: Warming up the colors
- Sharpen: We show the default values here but
could go stronger
Once we have corrected one image we can apply the same tools to
other images.
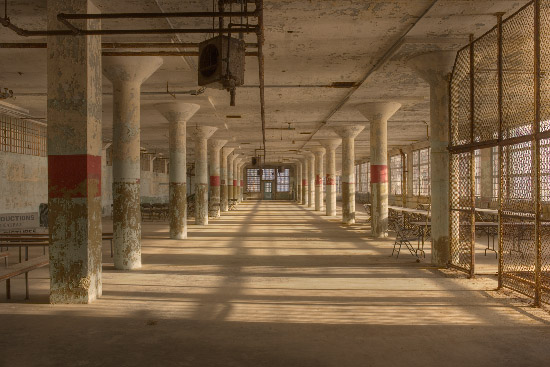
Color version from LightZone
Note: Smaller images on the screen always look darker
than larger images
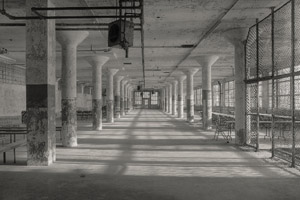
B&W Version
Really hard to say what we like better the color or
B&W version of these photos. But overall we like B&W a lot. The B&W
conversion is straight forward in LightZone:
B&W conversion
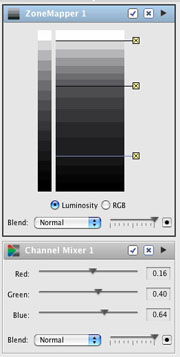
We use these two steps:
- ChannelMixer: You need to play with the channels
and also keep an eye on the picture and histogram to avoid blown
highlights or too muddy shadows.
- ZoneMapper: Most of the time B&W imaged can
call for more contrast and this is what we do with this ZoneMapper.
Split Toning
We can even create subtle split tones in LightZone:
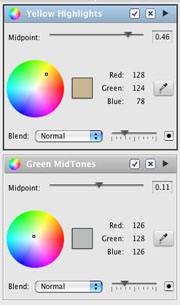
Split Toning with the Color Cast tool
Try split toning you B&W photos. This leaves us with the final result
in B&W:
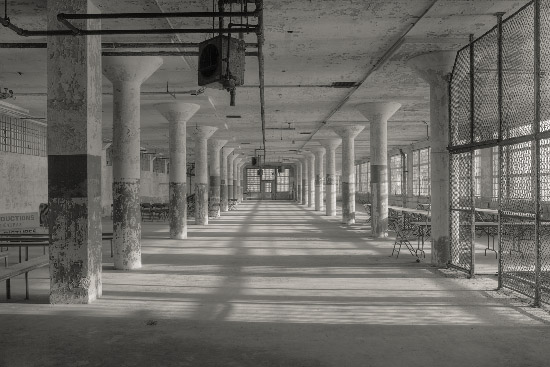
Toned B&W version
Conclusion
We think that using multiple exposures helped getting
the images we wanted (maybe even we have dreamed about). Photomatix
is a valuable tool to get the exposures merged and its batch feature
proved to be essential for our workflow. Final processing in LightZone
is very easy and feels natural.
Please feel free to discuss this workflow in our news
groups.
You can buy both products via the links on the top
of this page at a discount.
Discussion
Raoul
wrote (read the news group thread)
"One question for now, why you desided to
take 3 photo's and not more? Was this because of the space you were
working in, or do you think it makes no sense to shoot 7 or more
exposures (like i did till now)."
"If i tell you that in the film days i caried so much
light with me to balance the daylight with the inside light, this
HDR thing is a revolution for my workflow, but still to learn a lot."
Reply by Uwe
Very
good question. Actually you cannot enable shooting bracketed
sets of 5 or more in the 1ds2 without a computer. Now it is enabled
for the next time. I would have likely opted for 5 shots. |