7/31/2008 Two row panorama
We shot also one two row panorama:
Canon 40D, 50mm, 5 columns x 2 rows , original 15270x 4782 pixels
You have to photograph some extra space on both ends of the panorama because the length of the rows may slightly differ. As always we stitched in AutoPano Pro.
7/30/2008 Diary Start
We wished for a long time to get a pano head with the following properties:
- Motorized
- Automatic
- Light and portable
- Easy to use
- Solid
- Not too expensive
Looks like the AutoMate 1.0 fits the bill.
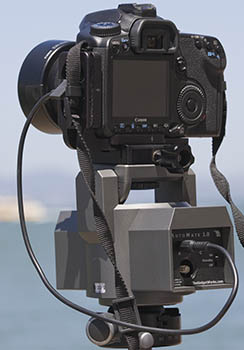
AutoMate 1.0
AutoMate gets attached to your tripod and rotates in two dimensions:
- Up/down (15 degrees up and 15 degrees down)
- Left/right (endless)
The AutoMate gets controlled via Bluetooth from an application running on a Pocket PC PDA. We mounted on the bottom an Arca style plate and on the top an Arca style clamp (more on clamps and plates here). This way we can mount the AutoMate on our normal head and the camera via the Really Right Stuff L-Bracket.
Setup of the AutoMate
- Mount the AutoMate on the tripod head. Check that the AutoMate is level horizontally
- Mount the camera with the L-Bracket on the clamp
- Connect the camera cable between AutoMate and camera (there are quite a few cables available).
- Turn AutoMate on
Note on nodal point adjustment: We hardly photograph close objects and the nodal point does not matter here very much. But we have a rail that could be used to adjust the camera for a horizontal nodal point. The vertical nodal point cannot be adjusted with AutoMate.
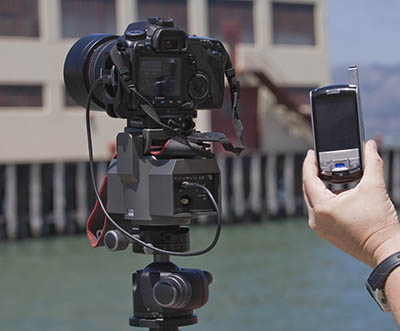
Setup the software on the PDA
We start AutoMate on the PDA and the main screen shows up:
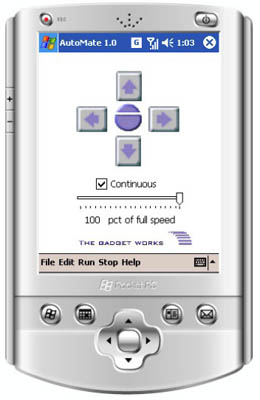
We won't cover the finer details as they are part of the manual.
The arrows move the head in the four controlled directions. The top half circle triggers the half pressed state of the camera and the lower half circle triggers the shutter for exposure.
Before you move the head best to hit the top half circle to establish connections between PDA and AutoMate.
Now we setup the different parameters. All key settings can be saved to your PDA. We save them onto a SD Card in our PDA.
Timing settings
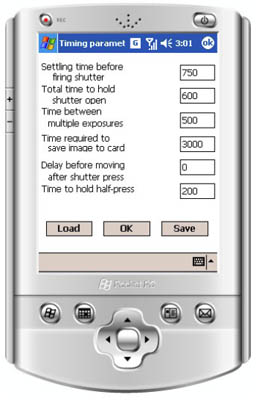
Most of the parameters explain themselves. There is plenty of control for all sorts of timing. All times are measured in milliseconds.
Lens settings
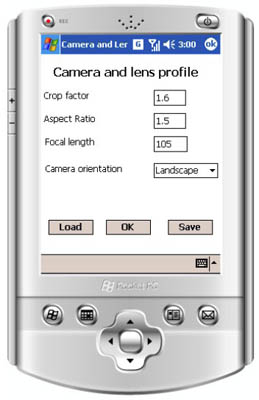
- Crop Factor: 1.6x for a Canon 40D
- Aspect Ratio: 3:2 equals 1.5
- Focal Length: We used mainly a 50mm f/1.2. We think primes are the way to go for panos. Because they are light and good at the same time. The angle of view is in the end controlled by the panorama settings (see below).
Panorama settings
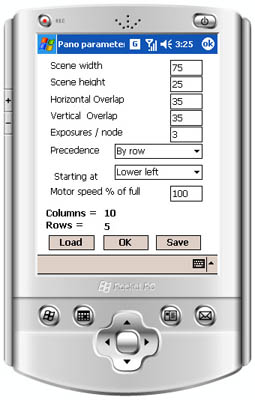
- Scene Width: 75 degrees (depends on the scene)
- Scene Height: 25 degrees (depends on the scene)
- Horizontal Overlap: 35% (our standard)
- Vertical Overlap: 35% (Our standard)
- Exposures / node: 3 (we shoot for HDR auto bracketing 3 shots)
We shoot row by row and start in the upper left corner.
Automate calculates the needed rows and columns (here 10 / 5)
Now we are ready to shoot a panorama. Of course many of these settings are standard and also stored on the PDA.
Photographing a Panorama
- AutoMate is on
- We established connection
- We move the head (via the PDA) to the upper left corner
- We set shutter speed, f-stop and focus manually as we want the same for all shots
- We set our 40D to Live View (means mirror up)
- Now we call "Run Panorama" in the AutoMate
The AutoMate now fully automatically takes all shots needed. The progress is shown on this screen:
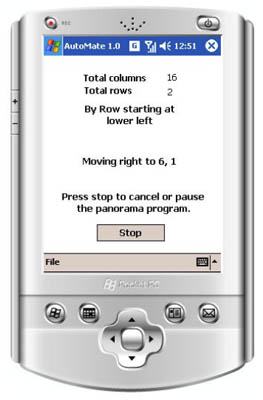
This sounds easy, right? Indeed it is.
Time Lapsed Photography
Automate also supports time lapsed photography which is a different thing entirely.
Our pano bag
We show our pano bag to demonstrate how portable the AutoMate (2 pounds about) is:
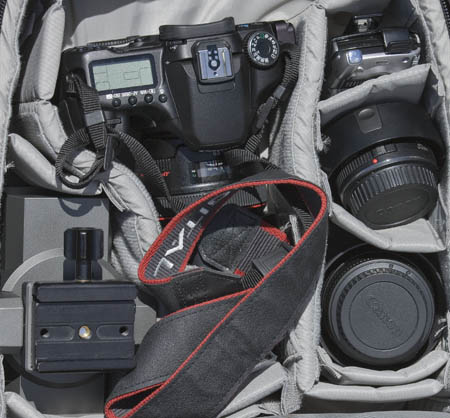
- Canon 40D
- Canon 50mm
- Canon 35mm
- Canon 85mm
- Canon 100mm Macro (in extra bag with 1Ds3)
- AutoMate
- PDA
- Camera cables (Canon + Nikon)
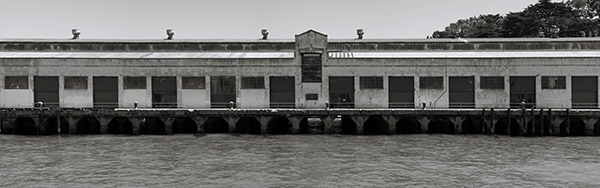
Sample shots
We use AutoPano Pro for all our panoramas (read more here).

Canon 40D, 50mm, 5 shots, original 19121 x 2473 pixels

Canon 40D, 50mm, 4 shots, original 11049 x 2039 pixels

Canon 40D, 50mm, 4 shots, original 15937x 2766 pixels
In an early test 2 weeks ago we also took a 2 row panorama with the Canon 1Ds Mark III and the Canon 100mm Macro lens. It also worked just great. This panorama was 2 row and 5 columns at 3 shots per location. This would mean 30 manual shutter releases and 10 manual head positioning operations. Too much to be fun for us.
Conclusion
Lets revisit our feature wish list:
- Motorized: yes
- Automatic: yes, excellent software control, well thought out
- Light and portable: yes
- Easy to use: yes
- Solid: We think so for the weight
- Not too expensive: about $600 + PDA, very reasonable we think
We have a lot of fun to use AutoMate. We hope to share more results in the future.
AutoMate web site
|