Highlight recovery sounds like finding something that is lost. But often the photos (we talk about RAW files here) actually contain the highlight data we need but the default RAW converter settings may not show them.
Highlights should never be clipped
For fine art photos the highlights hardly should ever be clipped (except these few specular highlights). Why? If you print clipped white in photos it will show as pure paper white in the print. This just looks ugly if these areas are more than just some very small spots.
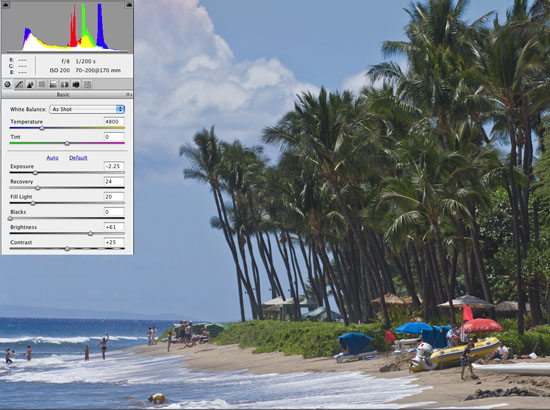
Introductory Sample
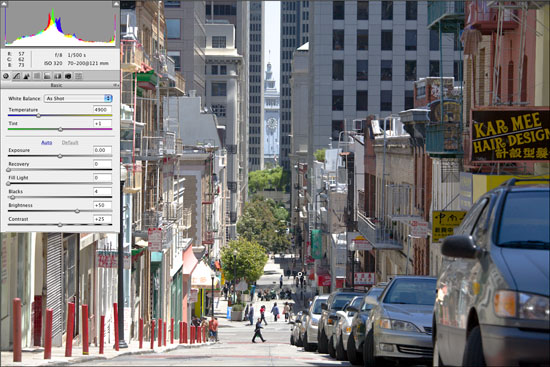
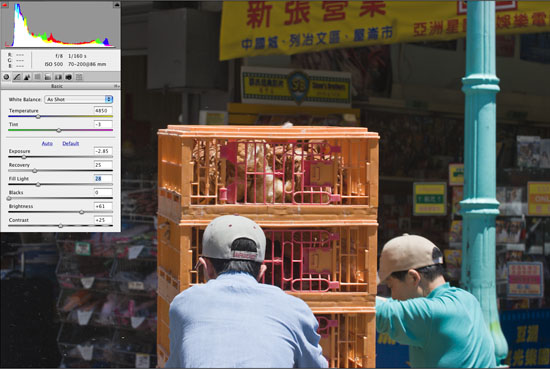
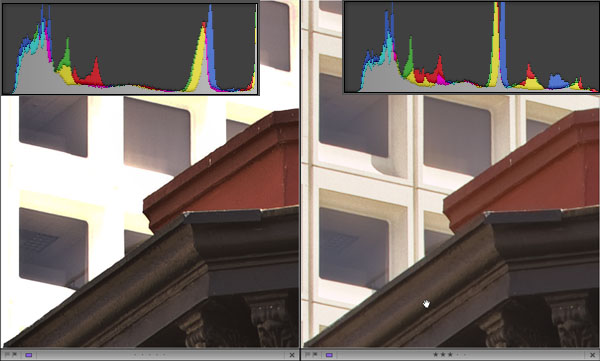
Canon 5D photo with ACR 4.1 default settings
If you watch the histogram you may think this image is a lost cause.
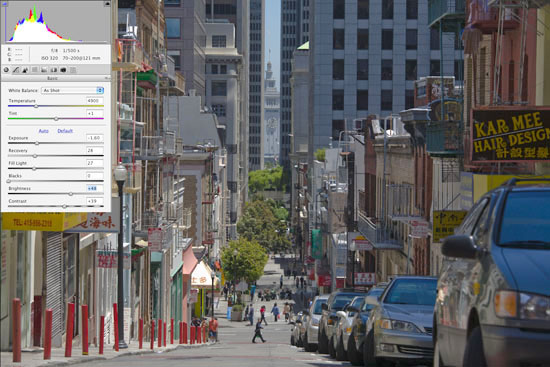
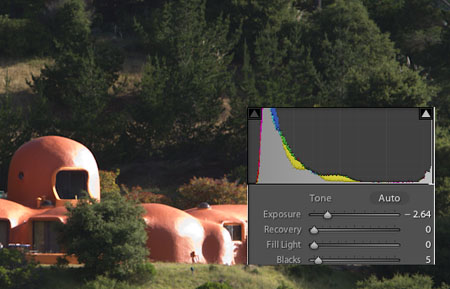
Recovered in ACR 4.1
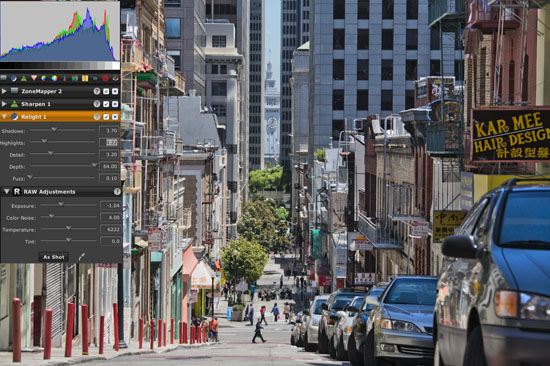
Recovered in LightZone 3.x
Programs like Camera Raw 4.1 (also Lightroom 1.1) or LightZone 3.x allow you to create very acceptable images from this overexposed shot:
- Correcting the exposure by about -1.5 EV (plus some extra Recovery in ACR)
- Because this darkens the image we need to add Fill Light in ACR or use the powerful Relight tool in LightZone
Note: an exposure compensation by -1.5 EV is actually quite a stretch for the Canon 5D. Most of the time -0.5 to -1 EV maybe a safer bet.
What does Highlight Recovery actually do?
- There are more real data for all 3 channels in the RAW file. We can often recover about 1.0-1.5 f-stops for the Canon 1D Mark III (Highlight Priority on) and about 2.0 for the Fuji S5.
- One channel is clipped (third channel is estimated)
- Two channels are clipped (which means likely only some sort of gray can be estimated)
- All channels are clipped (hopes are off)
Note: Type one is actually the most important type of highlight recovery because real data are used. The other types can easily show some artifacts in the image. As with all other things, use highlight recovery at a moderate level.
- Recovery of type 1 is what we would call quality recovery. Getting all you can get from the data.
- Type 2 can give ok results and may work for you
- Type 3 only works if your are very lucky (lucky looser :-))
- Type 4 is only worth mentioning if you capture the story of your life.
Not all cameras, firmware and sensors are made equal
Before we got our hands on the Fuji S5 and the Canon 1D Mark III the 5D had some of the best recovery potential of all digital SLRs. Most other cameras have a somehow lower latitude to recover highlights. Now the Fuji S5 (our review) and the Canon 1D Mark III (our review) show even more headroom.
The Fuji S5 has actually special dual pixels that are designed to capture more highlights. The Canon 1D Mark III uses special tricks in the firmware to capture about 1 f-stop more highlight data (called "Highlight Priority" mode, we use it all the time).
Some more examples
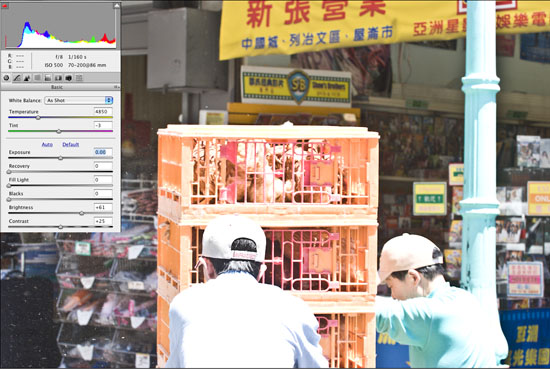
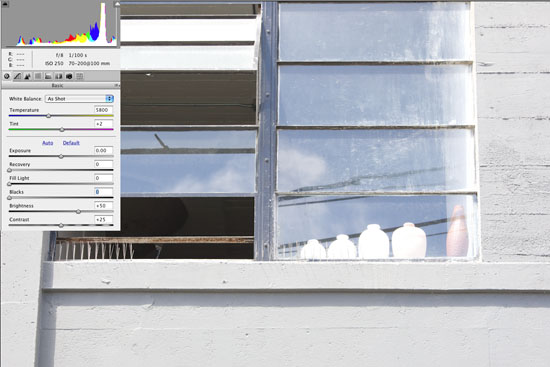
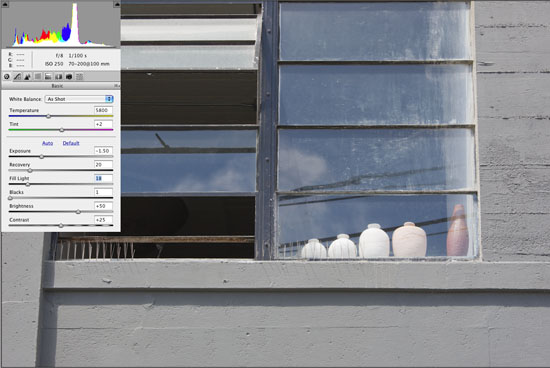
Fuji S5
We took this shot while in manual mode and photographing into the shade. It was a big surprise how much could be recovered:
Recovered photo in ACR
The Fuji S5 is clearly the digital SLR with the highest latitude in the highlights. But the Canon 1D Mark III comes close using its "Highlight Priority" mode.
Canon 1D Mark III with ACR 4.1 in default mode
Canon 1D Mark III with ACR 4.1 and data recovery
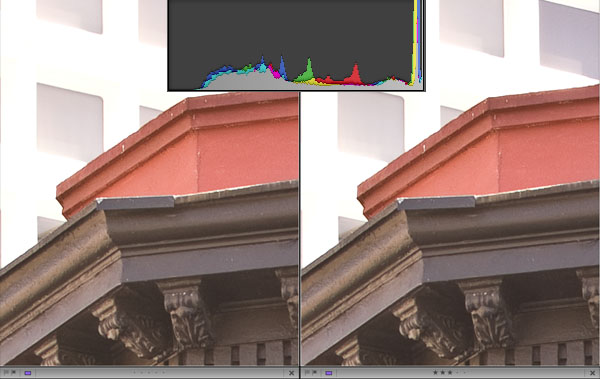
Watch for Recovery Artifacts
Playing too much the recovery game has its price. Here is an example where we get colorization artifacts from too much recovery.
Fuji S5 lost?
Recovered ?

Some magenta colorization in ACR 4.1
Still this is an amazing recovery. With some more editing we could reduce the magenta color cast from the clouds.
How do clipped data look?
Here are two examples of shots where even recoverycan get the highlights back.
Canon 400D way too much overexposed
If you observe a spike on the right after a lot of negative exposure compensation you have a photo that cannot be recovered with all the tricks in the book.
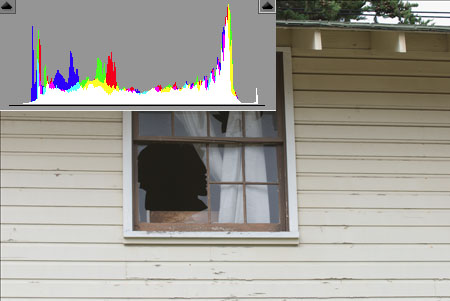
Clipped highlights with Nikon D80
In this case it looks as if you could properly recover the data, But the small spike on the right is suspicious. In this case we have issues with the highlights in the top right corner.
Lessons learned
- We have
seen that in some cases a lot of highlights can successfully be recovered. But too much overexposure is also a risky game.
- We solve this problem by taking multiple bracketed shots (for more read here)
- Read next section about "Expose to the right"
"Expose to the Right" revisited
There is this well knwon rule "Expose to the Right". We would say now:
- Expose as much to the right so that you can at least get a quality recovery (mostly of type 1)
This rule is like the following:
- If you are at a steep cliff you see more the closer you are to the edge
- Unfortunately if you get one step too far you fall down
This means for images:
- Getting as close to the right as possible is good
- Too far means you loose the image and no low noise in the shadows helps you with your lost highlights
- This means for your practice:
- Be conservative and watch too much overexposure like hell
- Bracketing is a good way to to discover how far to the edge you can go witout losing the shot.
Recovery for JPEG does not work
Unfortunately all the recovery we show does not apply to JPEG images (RAW is mandatory)
Overexposed JPEG and RAW (RAW on the right)
Recovery on JPEG and RAW
Note: We are talking about normal JPEG images. Kodak’s proprietary ERI-JPEG had additional highlight headroom built in.
Conclusion
Learn your camera in many different situations and check how much quality recovery your camera can perform (depends also on the RAW converter, not all RAW converters are as capable in highlight recovery as ACR 4.1 or LightZone 3.x).
|