Bettina and I are probably more known for our color
photos than B&W. We always loved B&W but find it a major hassle to
think in B&W and color at the same time. While working with B&W we
don't want
to be distracted by any colors. But on the other side all our photos
start as RAW color images. We published the first ever pure
RAW workflow with Capture One in 2003.
Especially while we browse through about 15-20K old RAW files to find
good candidates for B&W we don't want to see them in color first. Here
Lightroom
(read our review) provides
a very elegant solution for the following reasons:
- All RAW files can be imported just by reference
- Lightroom features a nice color to B&W conversion
1. No color!
We import a whole folder tree of RAW files (in our case e.g. a whole
year) into Lightroom:
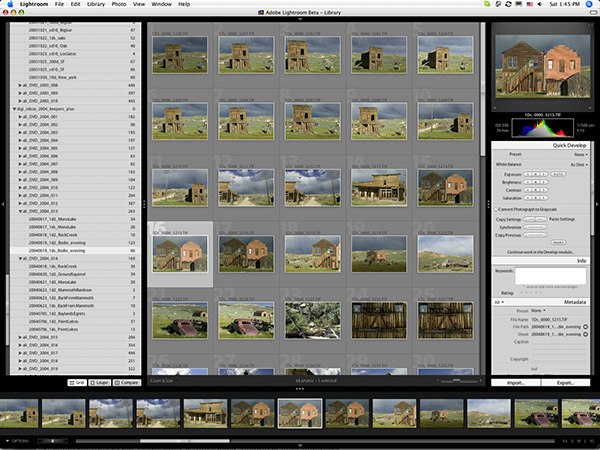
Color RAW files after import
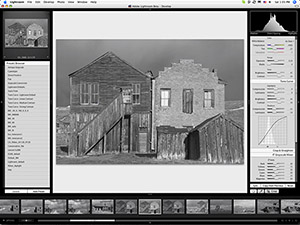
We then convert the first image to B&W
using the Grayscale Mixer in Lightroom's Develop module.
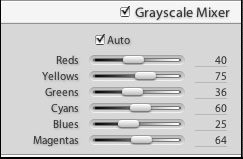
Grayscale Mixer
Actually "Auto" maybe a good default.
Then we select all the other images in that Shoot (e.g. all RAW from
2004) and synchronize the B&W setting only by using the "sync" feature
in the Develop module:

Sync Button
Lightroom then shows the following dialog
that allows you to specify which settings you want to synchronize:
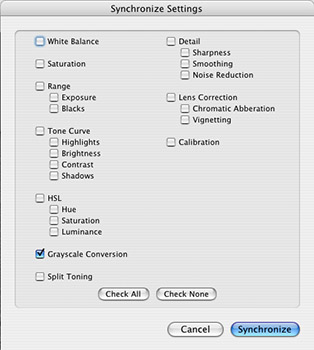
Synchronize Settings
Once you confirm with "synchronize" and
wait a bit your Library in Lightroom will look like this:
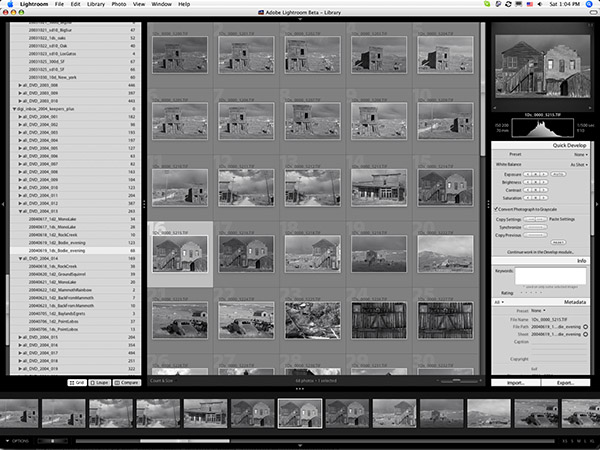
Library all in B&W
Note: You may later
see still some pictures in color as the real change is deferred. Don't
worry they turn B&W soon.
Now we can work in pure B&W and no color
is distracting you.
2. Converting to B&W
Here are our goals for converting to
B&W in Lightroom:
- Find a good color to B&W mapping
- Keep the file soft (no shadow and highlight clipping if ever possible)
so that we can tune the final image later in Photoshop
Although the Grayscale Mixer in "auto" is not bad we want to be able
to select between different conversion recipes.
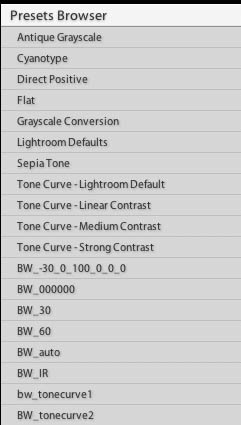
Different BW presets
Here the Lightroom presets come in handy. We store different
types on Grayscale Mixer presets and can recall them on a click of
a button.
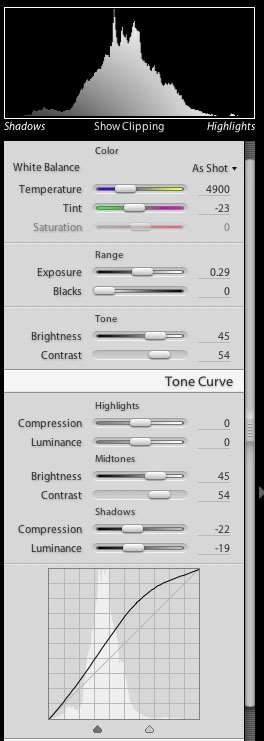
We watch the histogram all the time and also enable the
shadow and highlight warning indicators:
Of course you could do a lot of tuning in Lightroom but
we feel to have more control inside Photoshop. Often we set "Blacks"
to zero to avoid shadow clipping.
Note: You can hardly judge any clipping just by looking
at the histogram. We hope the histogram gets improved in the final
version of Lightroom.
3. Transfer to Photoshop
The obvious solution would be to use the Lightroom function
"Edit in Adobe Photoshop". But this will create an extra TIFF file
in the Lightroom library and we would later need to delete all these
temporary files manually. All we want is to get a temporary copy of
the converted file opened into photoshop.
That is why we use the Export function:
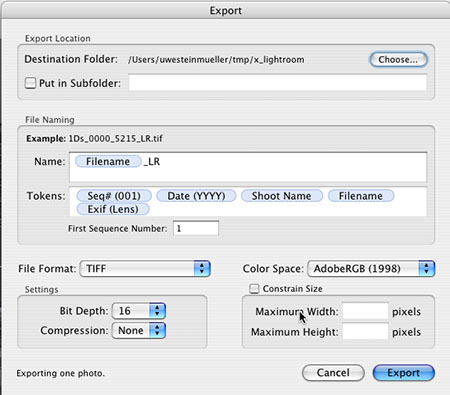
Export converted file
All files we export will be written to
a special folder for temporary files (see destination folder). It is
very easy to clean this folder up once we don't need the temporary
images anymore.
Notes:
- Always convert to 16bit TIFFs
- We would like to be able to export without opening the dialog (like
with Camera Raw)
- It would be even better if there would be an option to export the
file and then directly open it into Photoshop
We use Bridge to open the converted files from the destination folder:
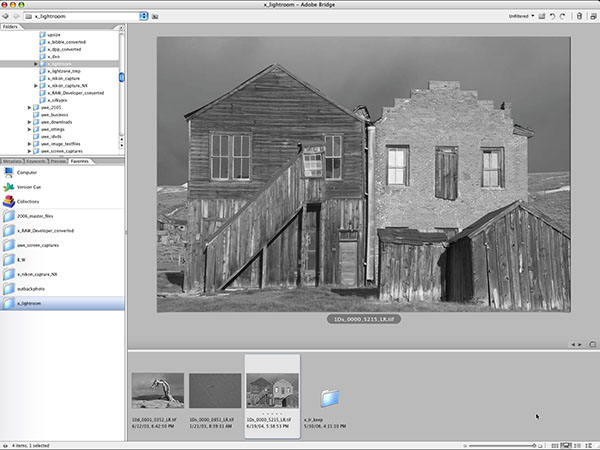
Open the converted file from Bridge
4. Fine Tuning in Photoshop
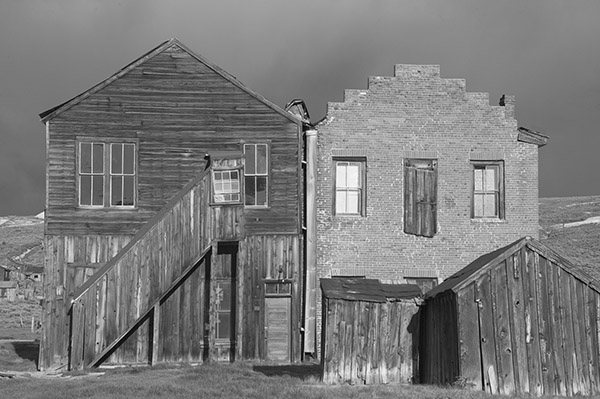
Converted in Lightroom
Why not do all the work in Lightroom? The answer is simple,
for our work Lightroom is missing some essential steps (this may change
in the final product though):
- Dust removal using the Healing Brush (a common task, read
about our tricks to make this task easier)
- Lens corrections
- Perspective corrections
- Use of special PS plugins
Right now we often use also the following filters on B&W images:
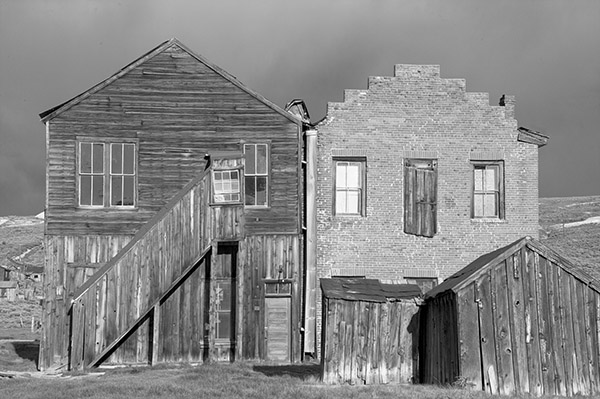
After running Enhancer
Finally we may improve tonality using
S-Curves (often selective to the midtones only) and Levels and then
also some final sharpening (no secret that we use our own EasyS
Plus).
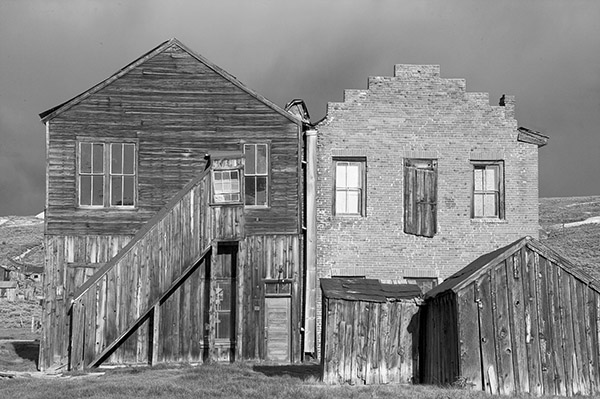
Final version
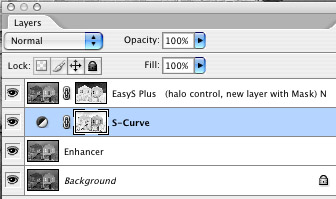
Final Layer Stack
5. Conclusion
We like browsing with Lightroom and view
all images as if they are only B&W. The Grayscale Mixer is also a
powerful tool to get good color to B&W conversions.
This way Lightroom helps us to think
in B&W only. |