We just recently presented an alternative method to tonemap HDR images. We also early found that the Photomatix Details Enhancer tonemapping also works very well on 16 bit images. As it turns out our new method also does an excellent job with 16 bit images.
We are in the process moving to Hollister, CA (50 miles South East of San Jose). Hollister is in the middle of wonderful rolling hills covered with oak trees. As you may know in our area of California we have most of the time boring (boring for photography) clear blue skies. To get good shots of oak hills you need clouds and some sun. This means that the hill still maybe in overcast. This tutorial will show how to bring life into those shots.
We find the principle situation of this shot quite often in available light photography:
- Bright background
- Foreground in shade
- Scene too big to use any fill flash or reflectors
We think Photomatix Details Enhancer does a wonderful job to help in these situations.
Note about noise: If your camera has a low dynamic range this method can result in quite noisy shadows. The Nikon D3x we used here works very well (like a Canon 1Ds Mark III or 5D Mark II). If you use cameras with lower dynamic range you should consider capturing multiple exposures for HDR.
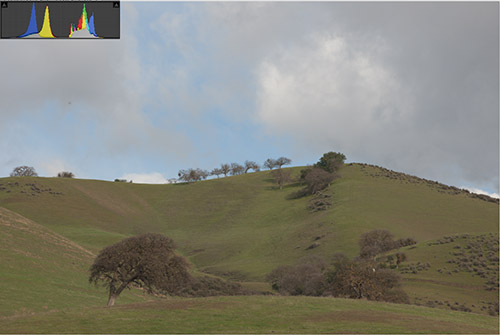
Start image in Lightroom 2.3
Note: We fixed the dust spot as our first step.
The challenge is to bring life to the hill and trees while not clipping the highlights in the sky. Simple operations in Lightroom could improve the situation but not as much as we would like. Starting from a soft image is much better than starting with clipped highlights and shadows.
We start with the same workflow as in our previous article (DOP Luminosity Color Tuning). The main difference is that we don't need the initial 32-16 bit conversion step. The rest is identical for a start.
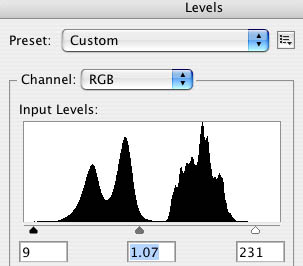
Levels to adjust white/black point and gamma
This step does not have to be very much fine tuned but there should be no clipping in the highlights and creating blocked shadows is not a good idea.
You can now either use the Photomatix Tonemapping plug-in or Photomatix itself. Because Photomatix 3.1 implements a slightly improved Details Enhancer this maybe the way to go. The only problem is that it is not as elegant as using the plug-in. We created scripts to use other applications as pseudo-plug-ins (check here). To make your life somehow easier we provide you with two free helper scripts. Put both scripts into your Photoshop/Presets/Scripts folder.
Using Photomatix
Run the script "DOP_LayerHelper_Duplicate_V1.jsx". This will create a duplicate image with all layers flattened. Save this duplicate to a temporary folder of your choice and close the image in Photoshop(!). Open this file into Photomatix (we select the target folder in Bridge CS4) and invoke Process->Tone Mapping.
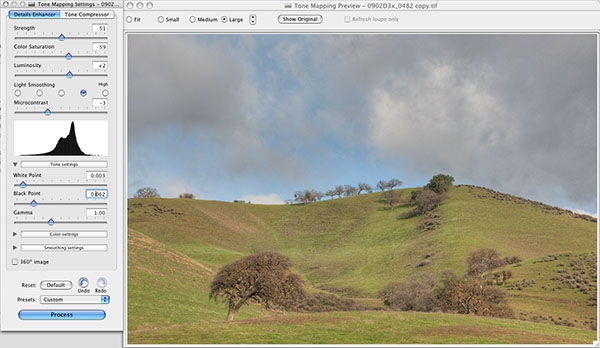
Photomatix Details Enhancer
We pay attention to the following parameters:
- Strength: about 50 works here
- Color Saturation: Slightly too strong (of this is personal taste)
- Luminosity: +2 seems ok
- Light Smoothing: +1
- Microcontrast: -3
- White Point: no clipping!!
- Black Point: no clipping either
- Gamma: mostly 1.0
Then we hit "Process" and save the result into the same folder where we read the image.
Now open the resulting file into Photoshop and run the script "DOP_LayerHelper_Paste_V1.jsx". This script will copy the tonemapped image as a new layer on top of the original image.
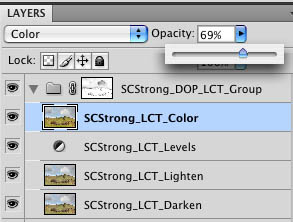
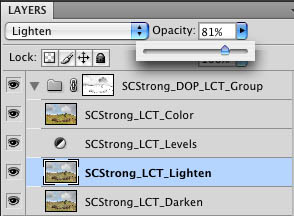
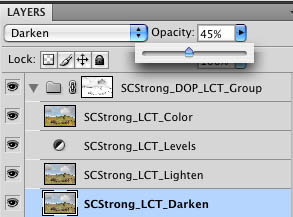
Now it is time to run the "DOP Luminosity Color Tuning" script. Details can again be found here. The purpose of the splitting process is to fine tune the Color, Lighten and Darken settings.
Contrast Tuning
This time we want to tune also the contrast like in this article. But we start with a different Curve
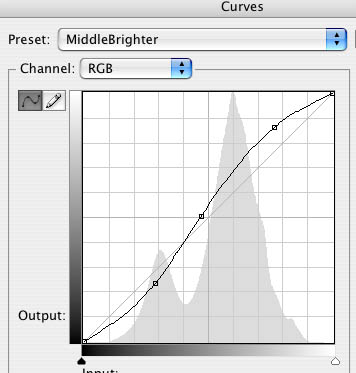
and use the "DOP Luminosity Color Tuning" again. Here are some tunings via layer opacity we performed:
Detail Resolving and sharpening
We use nearly always our own EasyD Plus Detail Resolver and some sharpening via EasyS Plus.
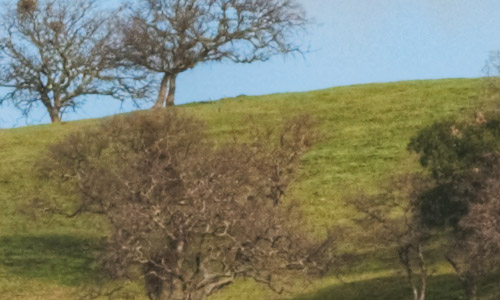
Detail before EasyD
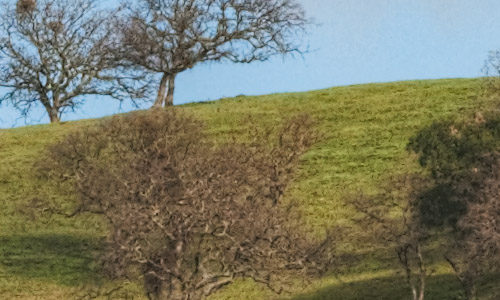
After EasyD (low settings)
Note: These trees are already slightly out of focus in the background and then haze is softening the image too. These are 100% pixel crops of a 24MP image.
In this case we actually masked the EasyD and EasyS layers to avoid getting too much detail from the sky:
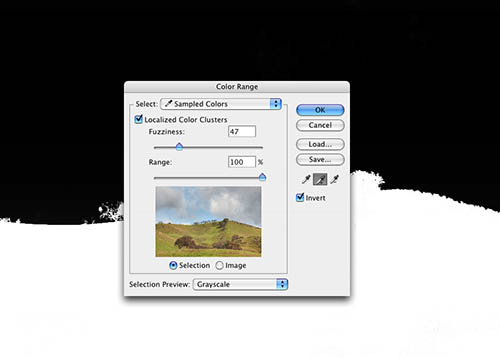
Selection created with Color Range
Note: The new Color Range in CS4 is much improved and maybe worth the upgrade to CS4 alone.
Tuning the Blue Sky
If you know our work you may know that we don't like skies we call "baby blue". We tone the blue down via the Hue/Saturation tool.
Here is our final layer stack:
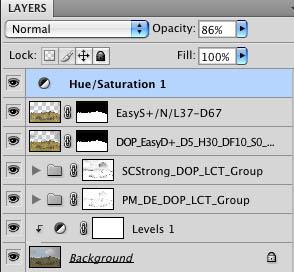
Final layer stack
This pictures get pretty big and we then flatten them if we like the result. Here is our final image:
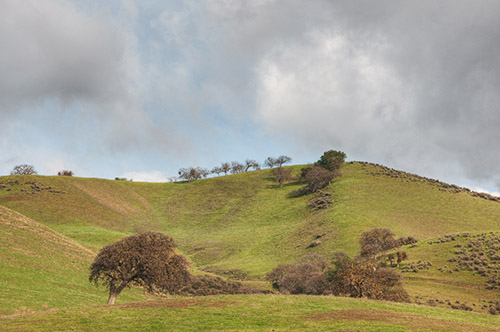
Final Image
The saturation is of course a personal choice. In our opinion the result gives some justice to the beautiful Hollister Oak Hills. This is a 24 Megapixel image that can be printed pretty big if needed.
Get a demo or order DOP Luminance Color Tuning
|