Note on image processing: While on the road we only inspect our photos/Videos briefly as we wait for detailed editing till we get home. This means that all the pictures/videos posted are some first versions that we would like to share. We still hope you can enjoy them.
11/11/2010 Short Movie and more Pictures
We created a short movie about Moab and Arches.
We still need to work on most of the images but created a new gallery of Moab photos.
Note: Some images are from Utah on our trip to and back from Moab. Utah is so beautiful.
11/07/2010 First Pictures
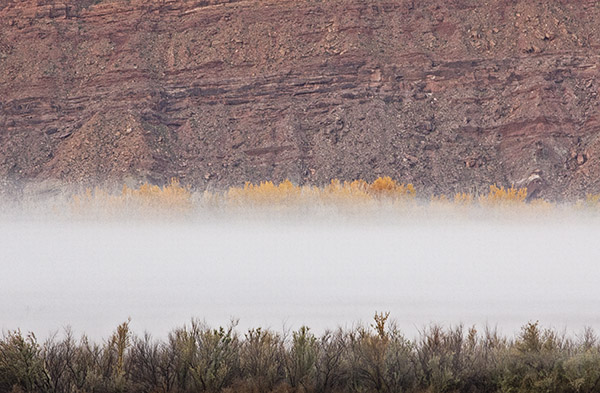
Moab in Morning Fog
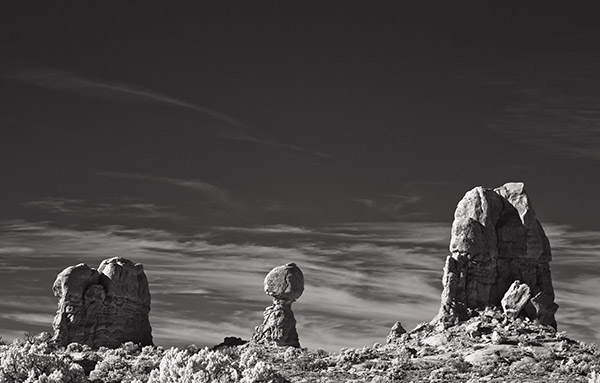
Balanced Rock (Infrared GF1)
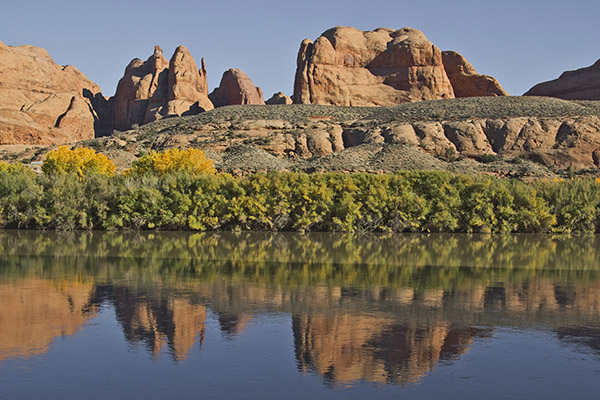
Colorado Reflections
11/03/2010 Our Photo/Video Gear for the Summit 2010 in Moab
This is now our 8th summit (2x Phoenix, 2x Page, 2x Zion, 1x Bryce and 1x Moab). These events were always wonderful. Mainly because of the great audience we had. All the people share a common passion for photography.
Join us on our trip. We try to publish multiple times during our trip.
Photo/Video Gear for Moab
This is the second time that we also plan to create videos at our summit. This is the result of the convergence of still and video (the early beginnings that is). The gear you see here got smaller over time. It is about the same when we shoot locally (we may then add a full set with the Canon 550D and the same set of lenses - we have them twice).
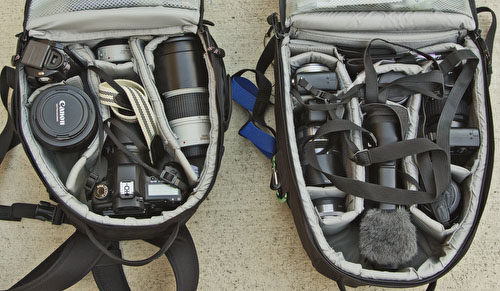
Note: This is gear for 2 people (Bettina and me)
Tripods
This change in perspective is mostly shown in the tripod and head used. While you can use sturdy photo tripods for video you cannot use your beloved ball heads. Why? You need to be able to perform "smooth" pans and tilts with your head. Sounds easy but it is not. Actually "smooth" is the term to remember if you make movements in video. Fortunately you can shoot still photos from a video head.
- We carry our own Miller Solo DS-10 tripod and head . Our setup can be used for video and stills.
- We also carry a second light weight tripod for our other cameras.
Bag #1 (Uwe)
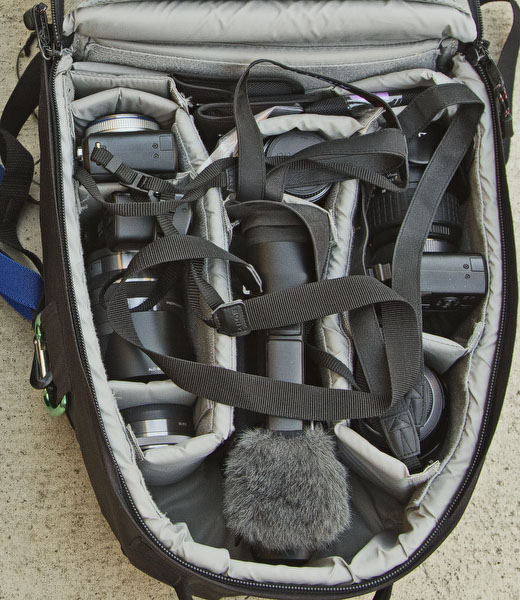
- Sony VG10 video camera
- Sony NEX-5 with 18-200mm Somy E-Mount lens
- Sony 16mm f/2.8 Pancake lens for lower light
- Panasonic GF1 IR modified camera
- Panasonic 7-14mm f/4 lens
- Panasonic 14-140mm zoom
- Panasonic GF1 (not modified) with Olympus 17mm f/2.8 Pancake lens
- X-Rite ColorChecker Passport
Bag #2 (Bettina)
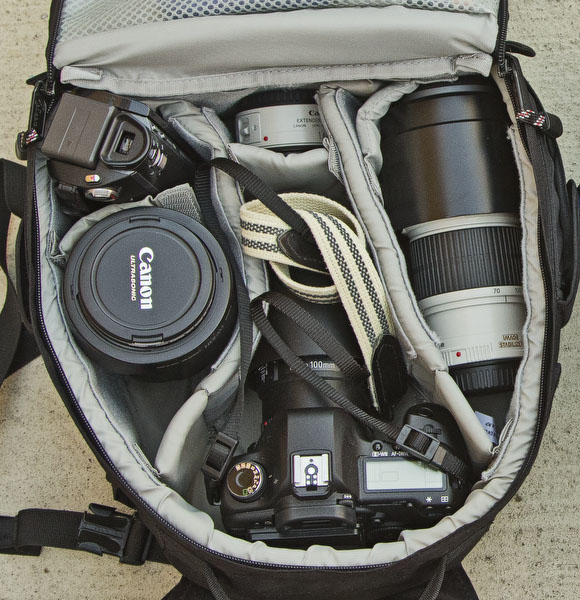
- Canon EOS 5D Mark II (on this trip mainly for stills)
- Canon 70-200mm f/4 IS
- Canon 24-105 f/4 IS
- Canon 100mm f/2.8 IS Mark II Macro
- Canon 1.4x tele-converter Mk. I
- Panasonic TM700 video camera (backup)
Travel Computer
- 15" Mac Book Pro (4GB memory, 320 GB Disk + 2x backup disks for the Mac)
- Software
- Lightroom 3.3RC
- Photoshop CS5
- Dreamweaver CS3 (for publishing)
- Photomatix 4.0
- Unified Color HDR Expose and Express
- Nik Software HDR Efex Pro V1.0
- Apple Final Cut Pro 7 for video (working with video on a laptop is limited and we carry an extra Firewire disk for more space and scratch disk)
- Of course all our DOP tools
Note on Backup on the road
With our equipment we listed two USB drives. Both contain full copies of our pictures/videos from the trip and they are with us all the time. This way we won't even lose images in case the notebook Mac would be robbed from the hotel/condo. We are also not depending on the remaining capacity on the Mac Book Pro (right now about 40GB). We never needed these backup images on our past trips. But better we do this little extra work and are safe. You never know when you may need it. Read our series about backup.
|


