06/21/2010 Alternative workflow
The workflow outlined below works fine but we recently preferred a slightly different workflow.
- We use a strong anti haze filter on the Canon 24-105mm f/4 IS lens (may not do that much but everything helps). We plan an article on our initial experience to capture aerial photos soon.
- Handling in Lightroom 3 as described below
- Crop, cleaning up and perspective corrections in CS5
- optional DOP Highlight Resolver if highlights are too aggressive
- Use DOP Local Contrast Optimizer (strong version) to improve local contrast
- Midtone contrast with DOP Contrast Plus V2
- Final sharpening with DOP Optimal Sharp
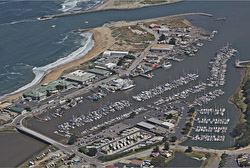
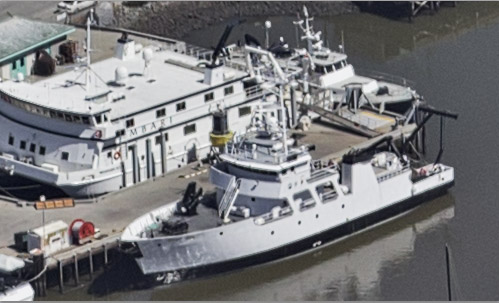
We followed exactly this workflow to create the photo below:
06/10/2010 Initial article
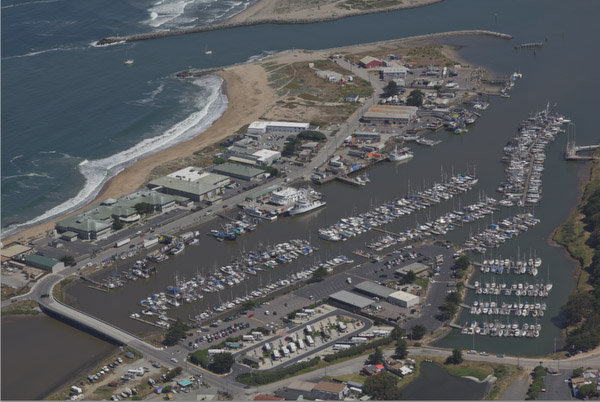
Each time you take on a new photographic subject you often face new challenges (often actually old challenges in a new context). Our first aerial shots from an airplane made clear that atmospheric haze is one of those challenges. You actually face the same challenge photographing hills or mountains in the distance. We were photographing from 1000-2500 feet altitude at about 90-110 miles per hour speed. Fortunately we were able to shoot through an open window so that glass was not yet an even stronger challenge.
Our first test was done with a Canon 550D and the Canon 24-105mm f/4 IS lens. The shot we cover here was taken at 1/1600 sec, f/6.3 and ISO 200. The air was kind of medium hazy (means neither very clear nor very bad). Some will claim that these new cameras hardly have any noise at ISO 200. This maybe true for many images but in case of our aerial shots we need to get the local contrast and detail so much enhanced that you will find noise in water, skies and smooth surfaces. The noise looks normally just like grain and only can be a problem if you pull out the finest details. Noise at ISO 400 can be even too much at times.
Now lets talk about our processing.
Preparation in Lightroom 3
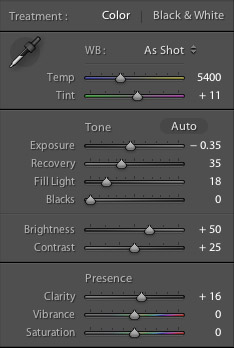
- Getting a good White Balance is not trivial. In this case "As Shot" seemed to work pretty well.
- We needed some Highlight Recovery to get soft highlights
- We also want the shadows to be open and Fill Light helps here (we rarely use values over 20 though)
- A bit of Clarity cannot hurt either.
- Set the Point-Curve to linear (we like to control the blacks later in Photoshop)
- We reduce a bit blue in HSL and tune up the reds
- Sharpness and Noise Removal
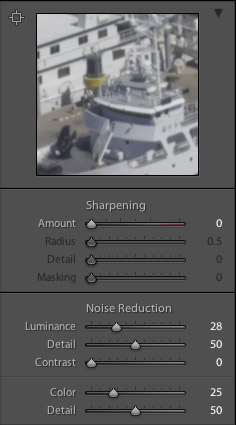
We always leave the sharpening to 0 because later in our detail extraction scripts we don't want to amplify any latent halos. With normal images we would leave the Luminance noise removal off for ISO 200 images. In this case we want to remove some grain in the water and sky. Color Noise removal is left to the default.
Following these step we get the following image (remember we did not use any sharpening)
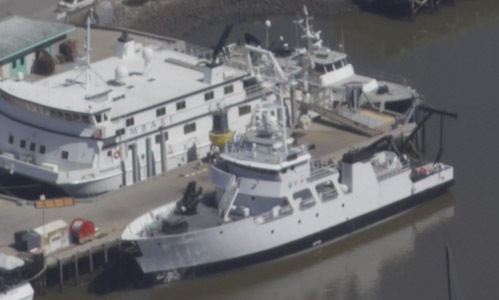
Out of Lightroom 3
Detail Extraction
The key step to cut through the haze is to improve the detail and local contrast. Here we use our own DOP Detail Extractor V2.0 with the following settings:
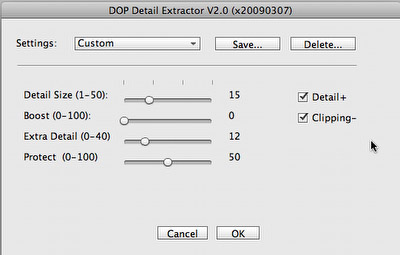
We found that these settings get us nice detail while not making the image to harsh. This is always a tough balance to master. It depends also a lot on the image and light (likely even more other factors).

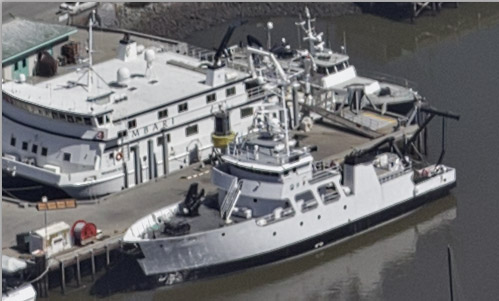
After Detail Extraction
Note: We also used the Photomatix plugin with good success to perform the detail extraction. We then leave the layer in Luminosity mode to avoid color shifts.
Good Midtone Contrast
Now it is time to improve the midtone contrast without clipping the highlights and shadows. We use our DOP Contrast Plus V2 tool for this.
After DOP Contrast Plus V2
Mild Highlight Tuning
In this case we wanted to tone down the highlights just a bit (very little) and used for the the DOP Highlight Resolver.
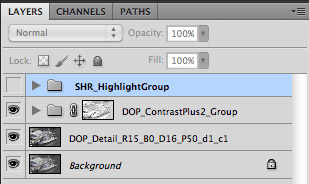
Final Layer Stack


Final result
Conclusion
We think we found for now quite a good solution to remove the haze from our aerial photos. Important is to stay at low ISO and keep the shutter speed high. We hope to be able to have more flights and explore this new world of aerial photography much more. |